
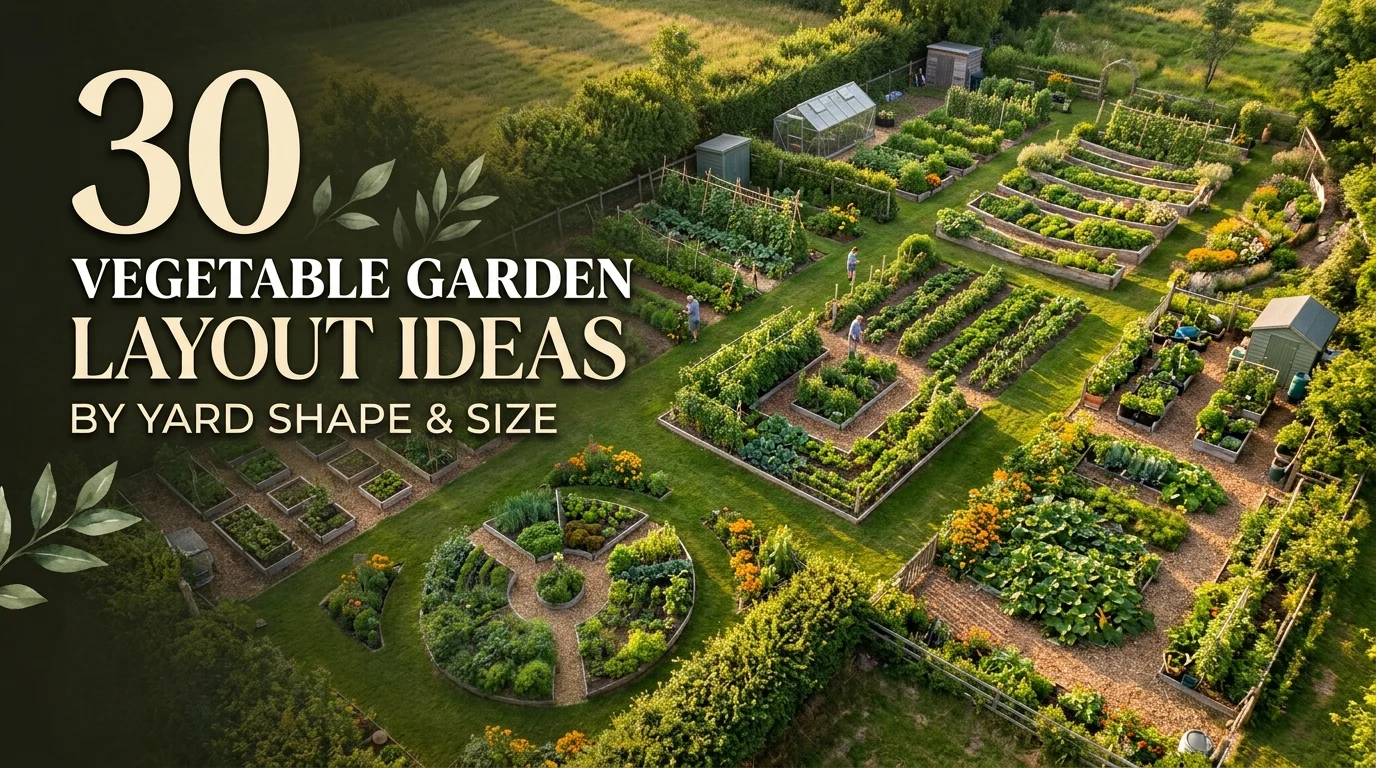
30 Vegetable Garden Layout Ideas by Yard Shape and Size
Every yard has something working against it. Maybe yours is a long strip along a fence, a corner lot with two street-facing sides, a slope that turns to mud when it rains, or a rental where digging isn’t an option. I’ve noticed that most garden layout advice assumes a wide, flat, sunny rectangle, and that’s simply not what most people are working with. The real question isn’t “what’s the ideal vegetable garden layout,” it’s “what works for the specific yard I actually have.” A garden layout vegetable plan only works if it fits your yard’s shape, slope, sun pattern, and any limits on what you’re allowed to change. This roundup skips generic advice and matches a specific layout idea to a specific yard shape or constraint, so you can find the entry closest to your own situation. Even 80 square feet or a yard shaped like an L has a workable layout waiting here. Let’s start with one of the trickiest shapes to plan around.
1. The Narrow Side Yard
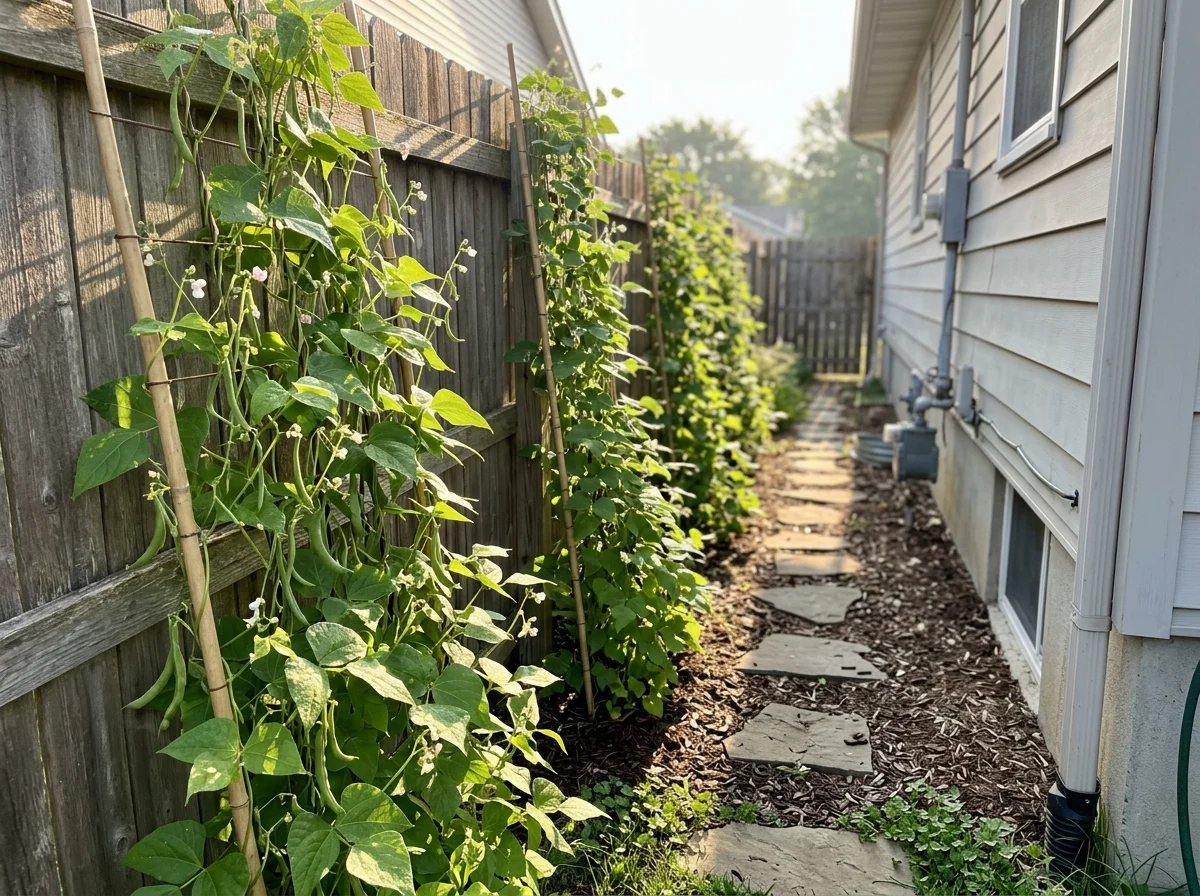
A side yard between two houses, often just 3 to 5 feet wide, works best as a single-file row garden with a narrow path on one side. Grow tall, vertical crops like pole beans, cucumbers, or trellised peas along the sunnier fence line, since narrow spaces rarely get sun from more than one direction.
2. The Corner Lot with Two Street-Facing Sides
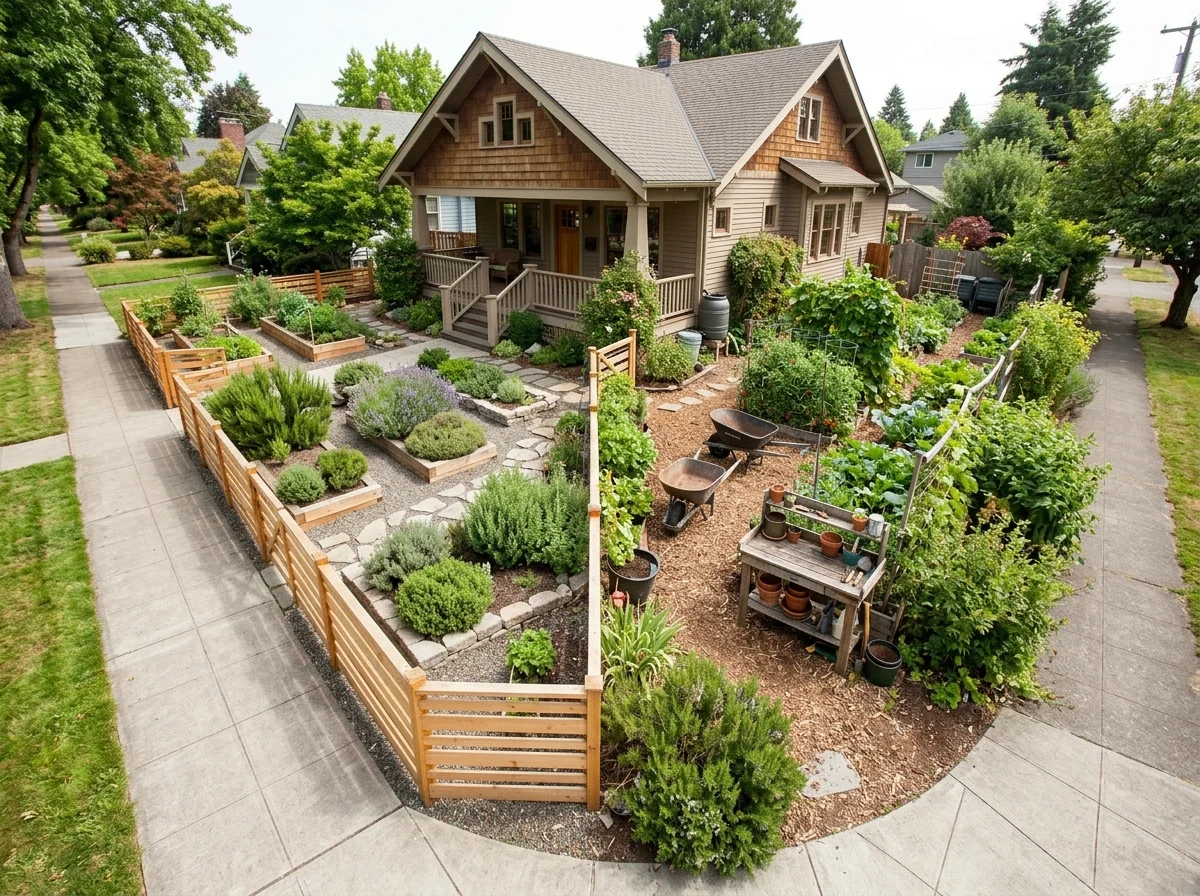
Corner lots get more visibility than typical yards, so split the layout into a tidy, low-growing front section facing the street and a more relaxed working garden on the side that gets less foot traffic. Use compact varieties and clean edging on the visible side, and save sprawling crops like squash or pumpkins for the section around back.
3. The Sloped Backyard
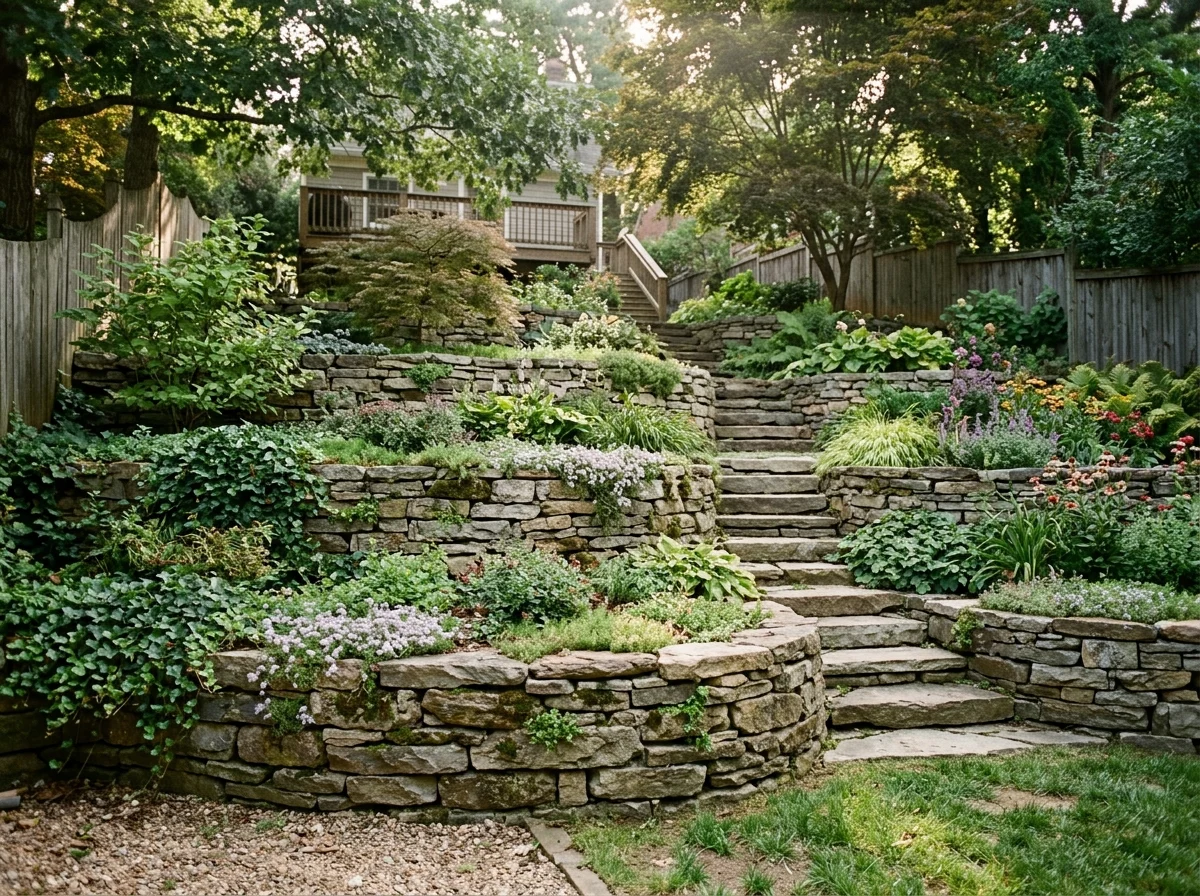
On a slope, build a series of terraced beds using retaining boards or stacked stone to create flat, level planting surfaces that stop soil and water from washing downhill. Each terrace should be at least 2 feet deep to hold enough soil for root crops and larger vegetables.
4. The Tiny Under-100-Square-Foot Yard
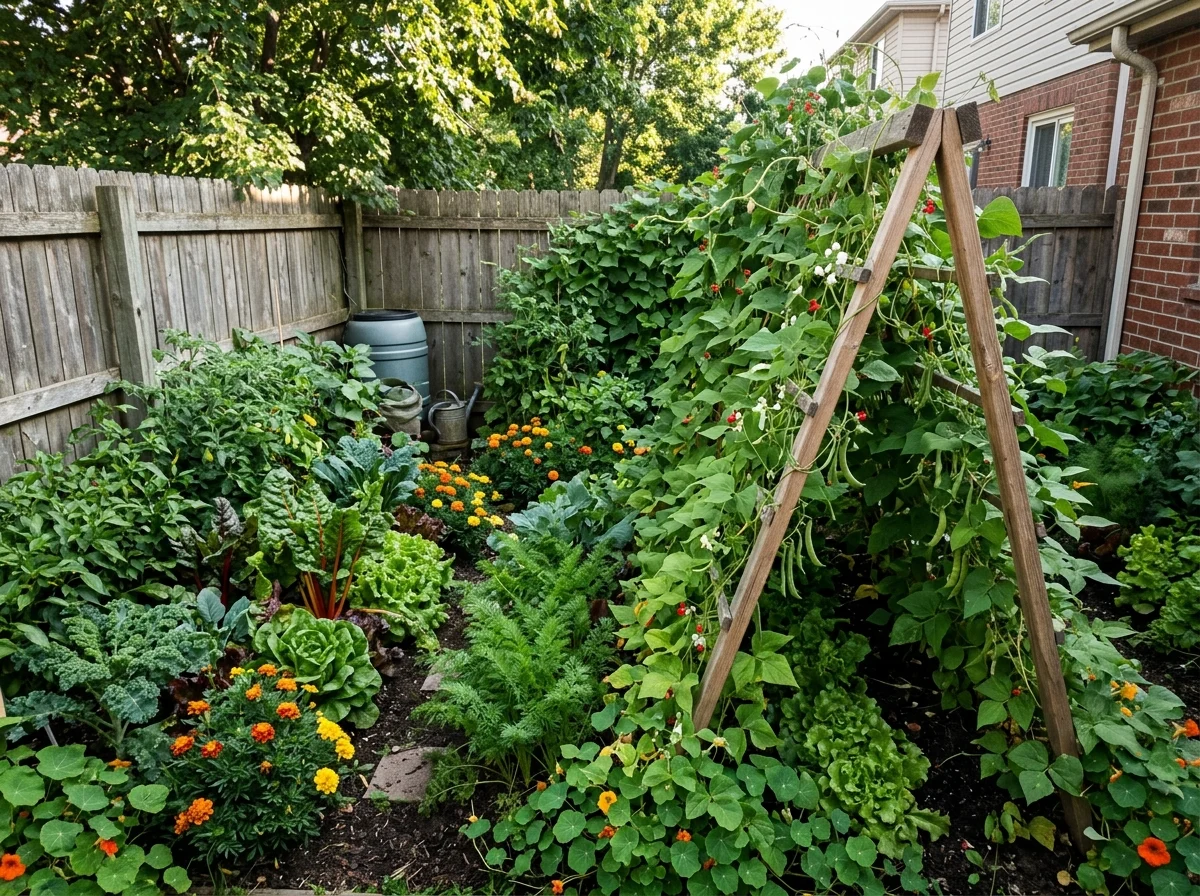
In a space this small, skip separate beds entirely and use one continuous block layout with vertical structures built in from the start, like an A-frame trellis at one end for climbing crops. Focus on high-yield, space-efficient plants such as bush beans, compact peppers, and leaf lettuce instead of sprawling squash or corn.
5. The Oddly Angled Yard
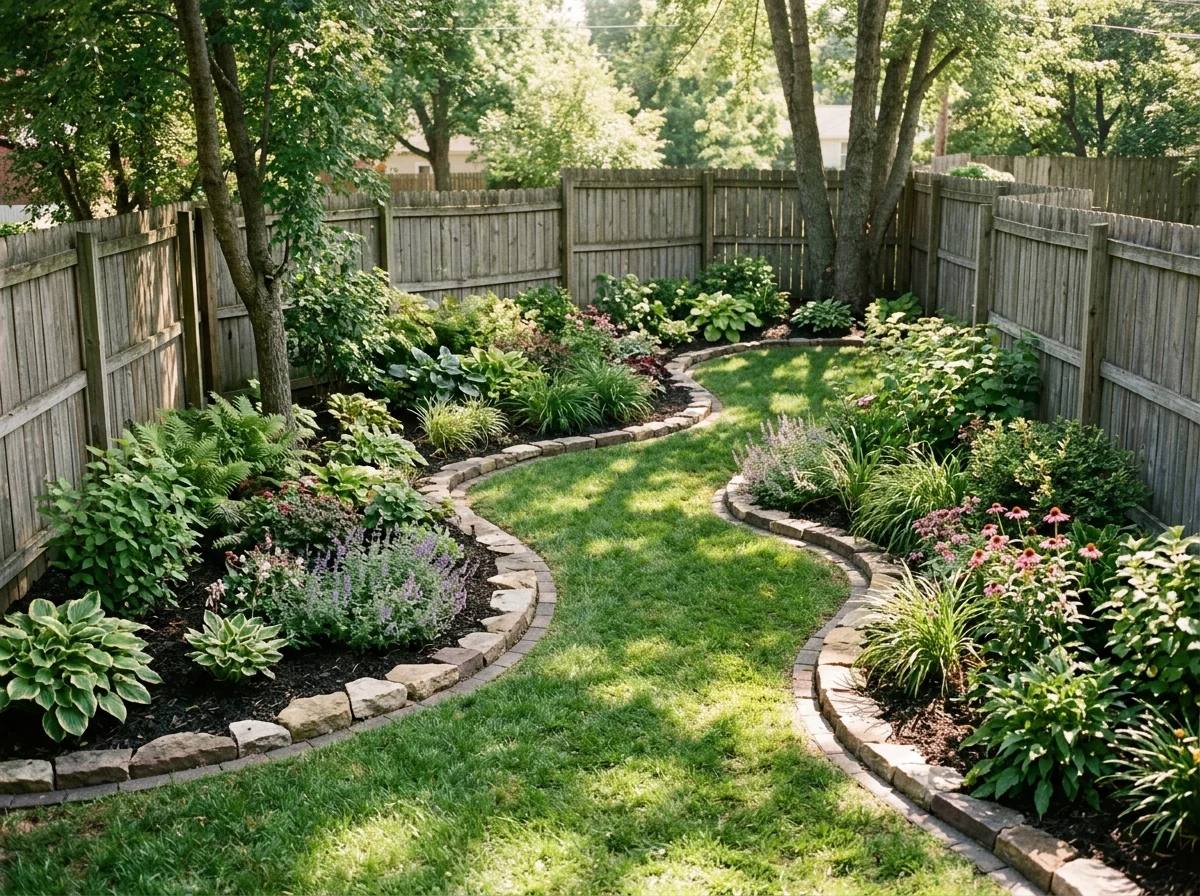
For a yard with irregular angles instead of clean rectangles, use curved or freeform bed edges that follow the yard’s natural lines instead of forcing a grid. Raised beds with straight sides tend to leave awkward, wasted triangles of space in an angled yard, while curved in-ground beds use the same footprint more efficiently.
6. The Rental Yard You Can’t Dig Into
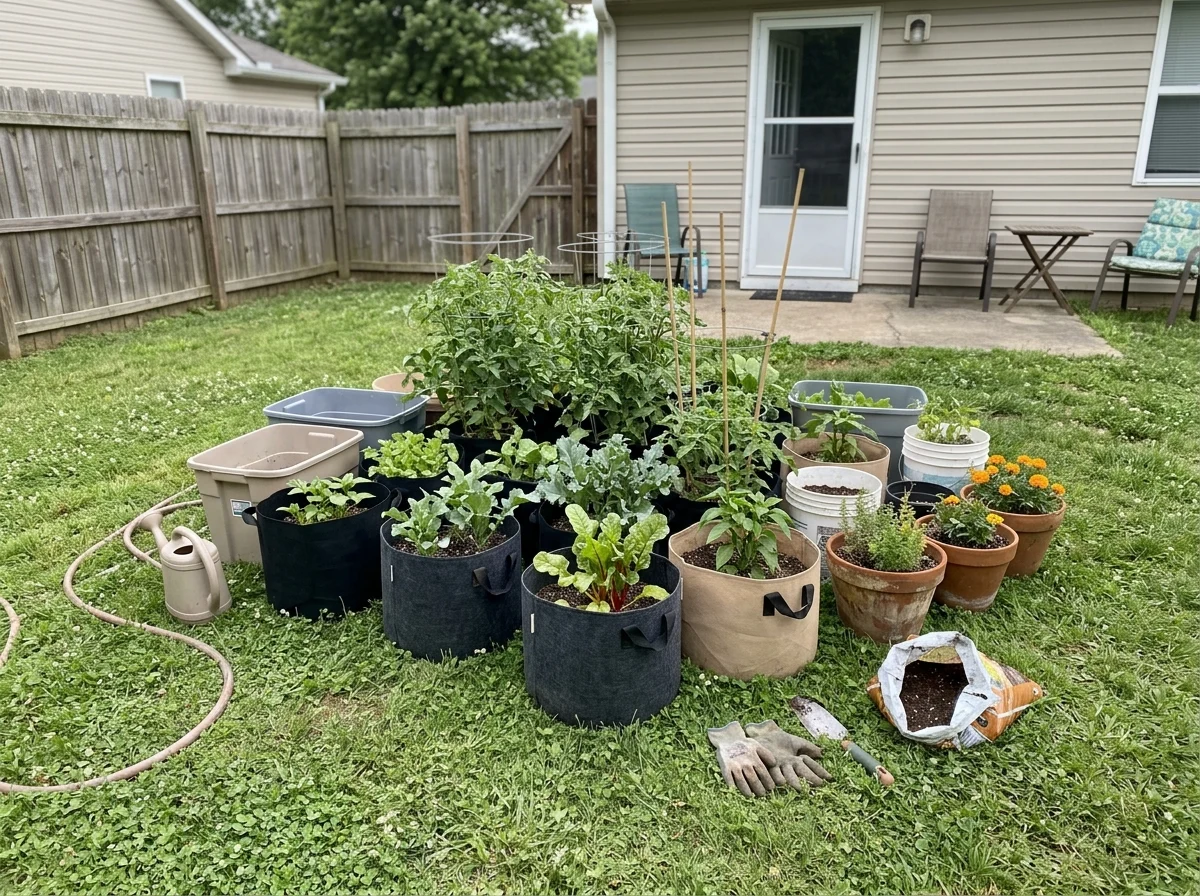
If your lease doesn’t allow digging or permanent beds, build the entire garden in containers and raised beds set directly on top of the existing lawn or patio, using a weed barrier fabric underneath. Fabric grow bags are especially useful here since they’re lightweight and easy to move out entirely at the end of a lease.
7. The Wide-but-Shallow Yard
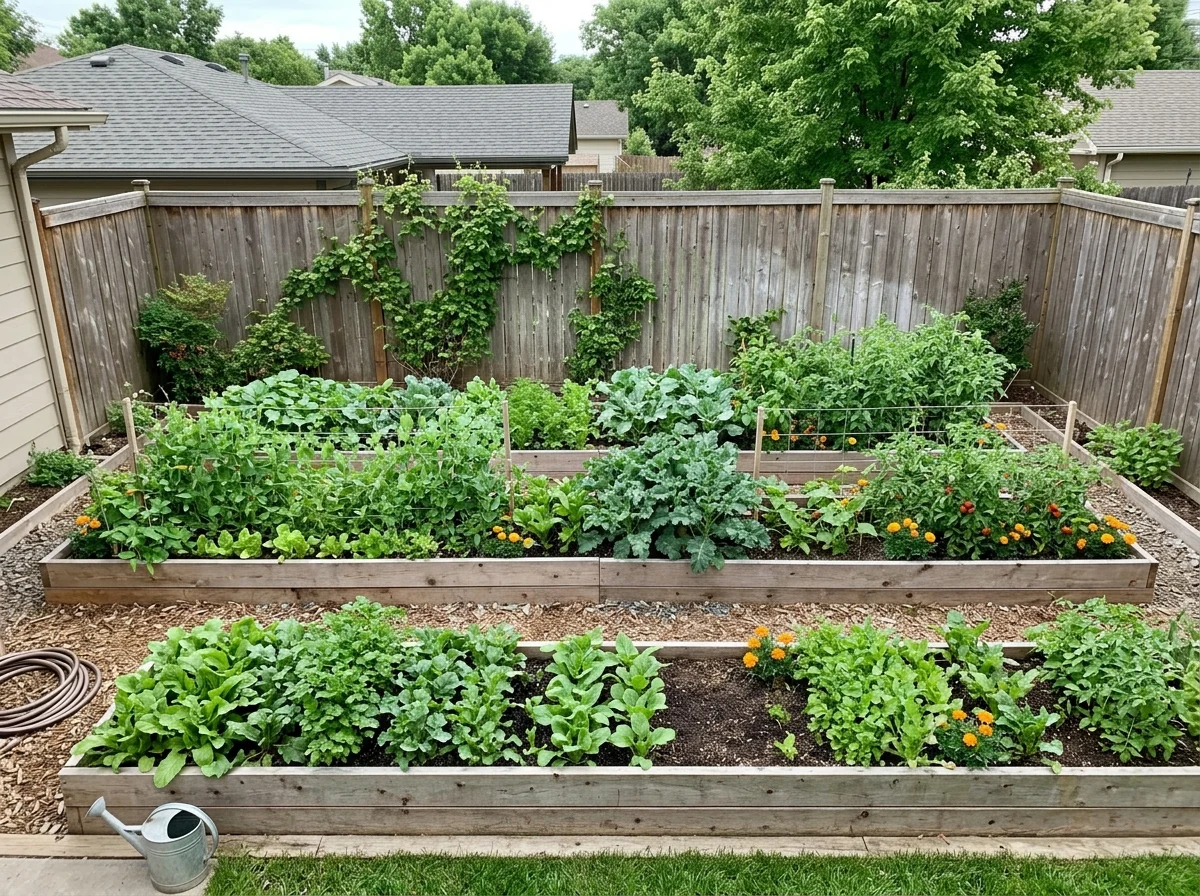
A yard that’s wide but doesn’t extend back very far suits a row of parallel raised beds running side to side instead of front to back, maximizing the usable width. Keep beds no more than 4 feet deep so you can reach the back from a path without stepping into the soil.
8. The Yard with a Large Shade Tree
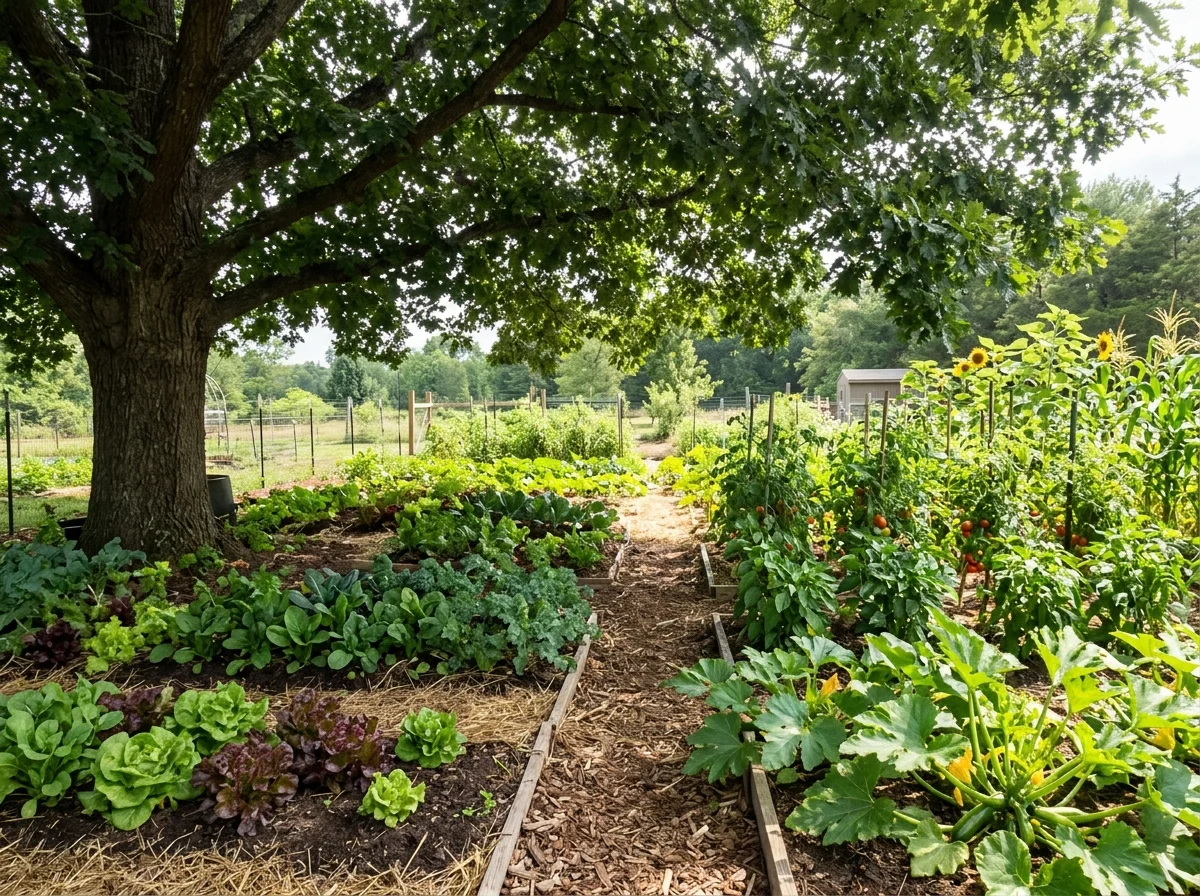
Work around a big shade tree by placing sun-loving crops in the sunniest arc of the yard away from the canopy, and using the shaded area under and near the tree for shade-tolerant crops like lettuce, spinach, and herbs such as mint. Avoid digging large beds directly over major tree roots, since this damages the tree and competes for its water.
9. The Long, Narrow Backyard
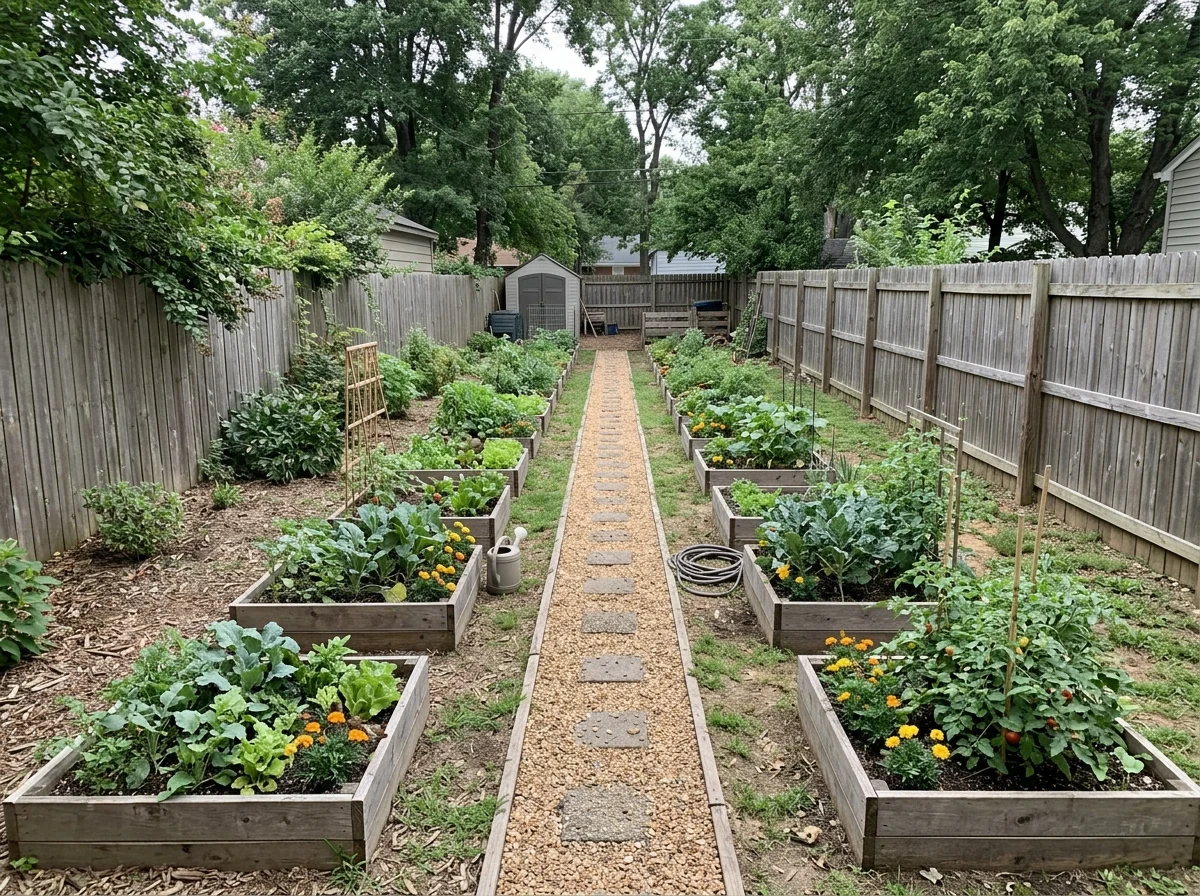
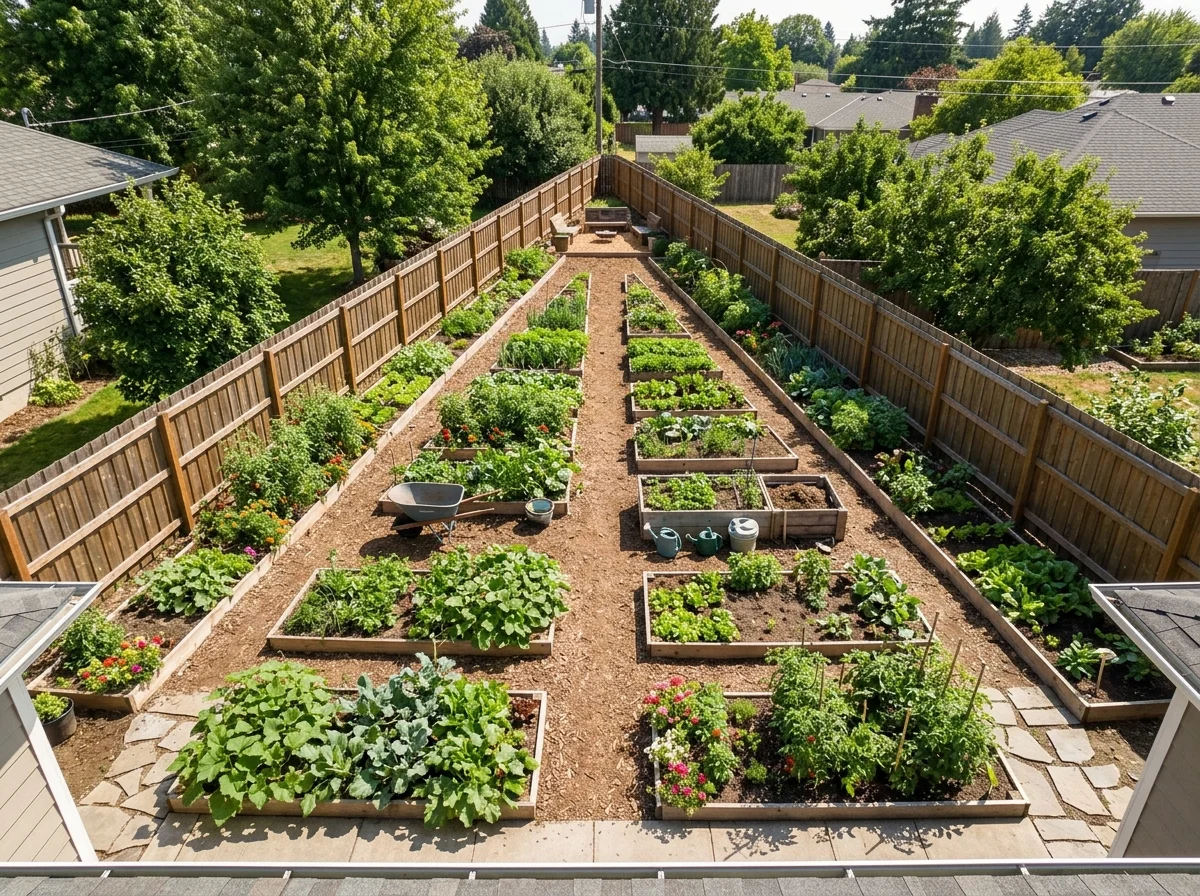
A long, narrow backyard suits a series of short raised beds arranged in a line down the length of the yard, connected by a single central path. Break the run into distinct sections, such as a salad zone, a tomato zone, and a squash zone, so the space doesn’t feel like one endless row.
10. The Yard That’s Mostly Patio or Hardscape
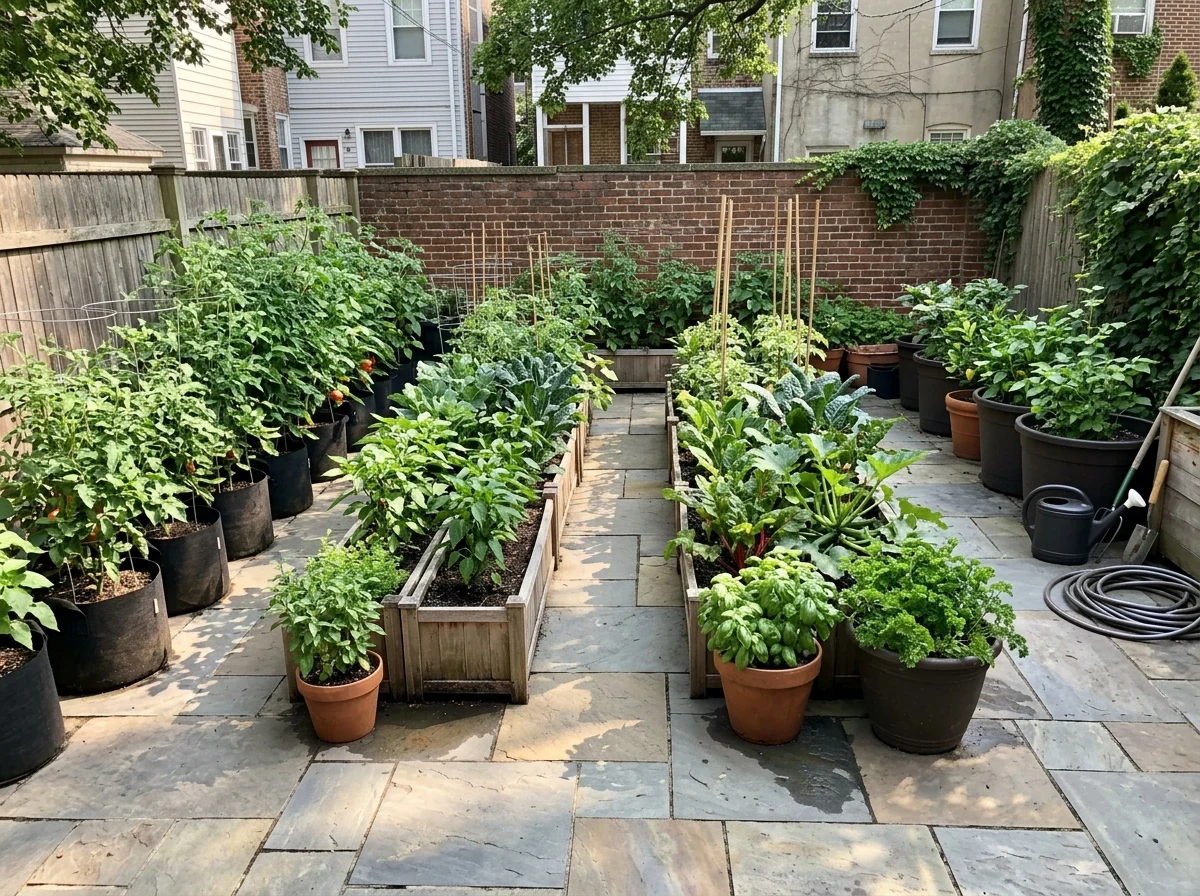
When most of the yard is paved, container gardening in a grid arrangement along the sunniest edge of the hardscape turns unused pavement into productive growing space. Group containers by watering needs, keeping thirsty crops like tomatoes together and lower-water herbs separate.
11. The Yard with Poor, Rocky Native Soil
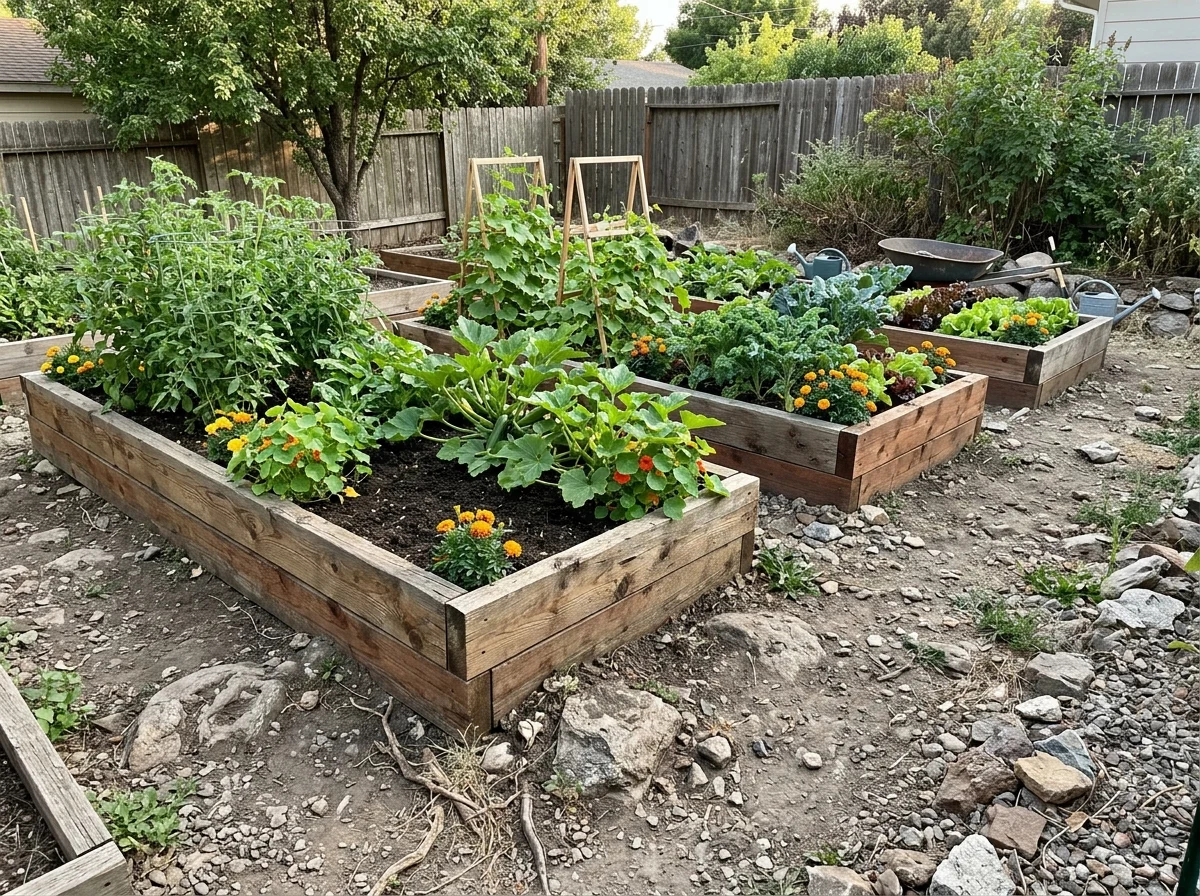
Skip fighting rocky or compacted native soil entirely and build a layout of deep raised beds, at least 12 inches tall, filled with quality soil brought in from outside. This sidesteps the soil problem completely instead of spending a season trying to improve ground that may never support vegetables well.
12. The Small Front Yard Without a Backyard
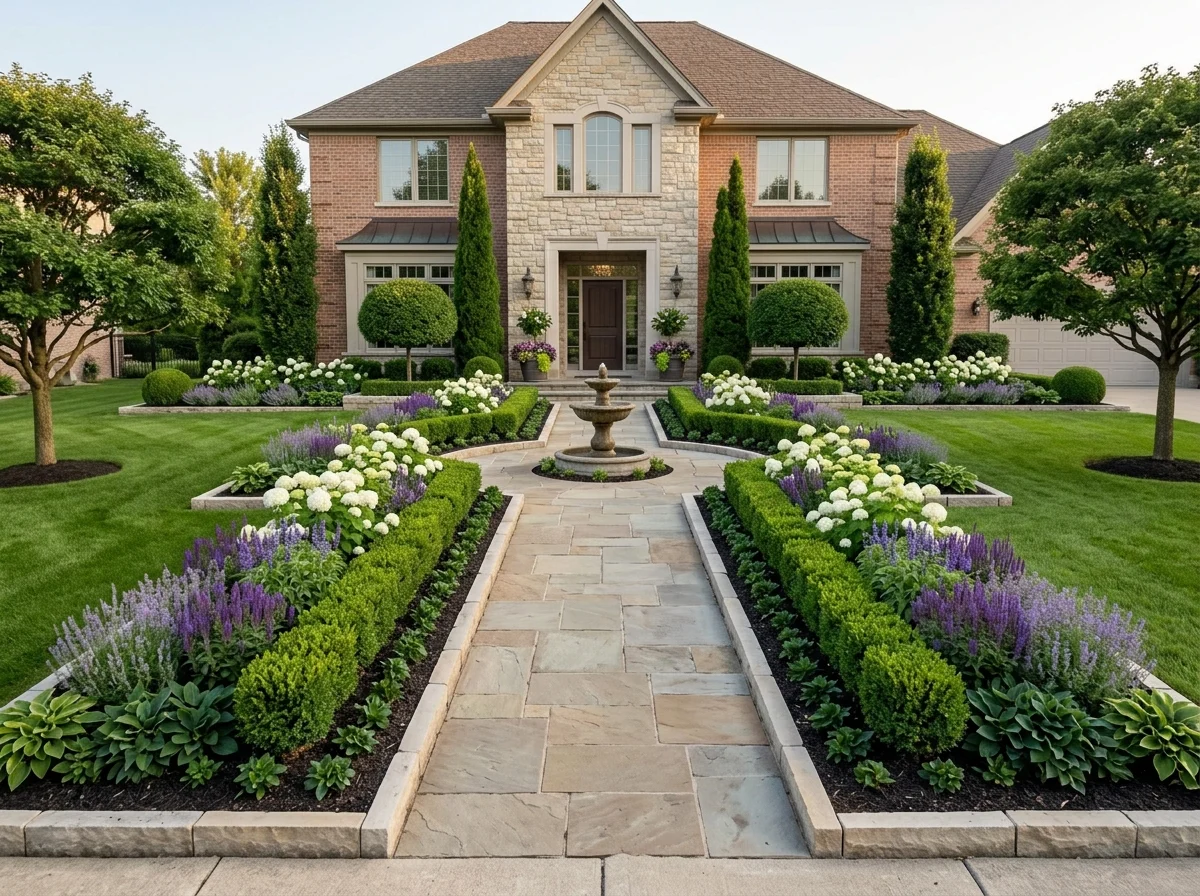
If a front yard is your only growing space, choose a formal, symmetrical layout with defined edges, low-growing crops near the front, and taller plants like tomatoes or trellised beans set back near the house. A neat, intentional-looking layout reads as landscaping instead of a haphazard garden to neighbors and passersby.
13. The Yard with Strong Afternoon Wind
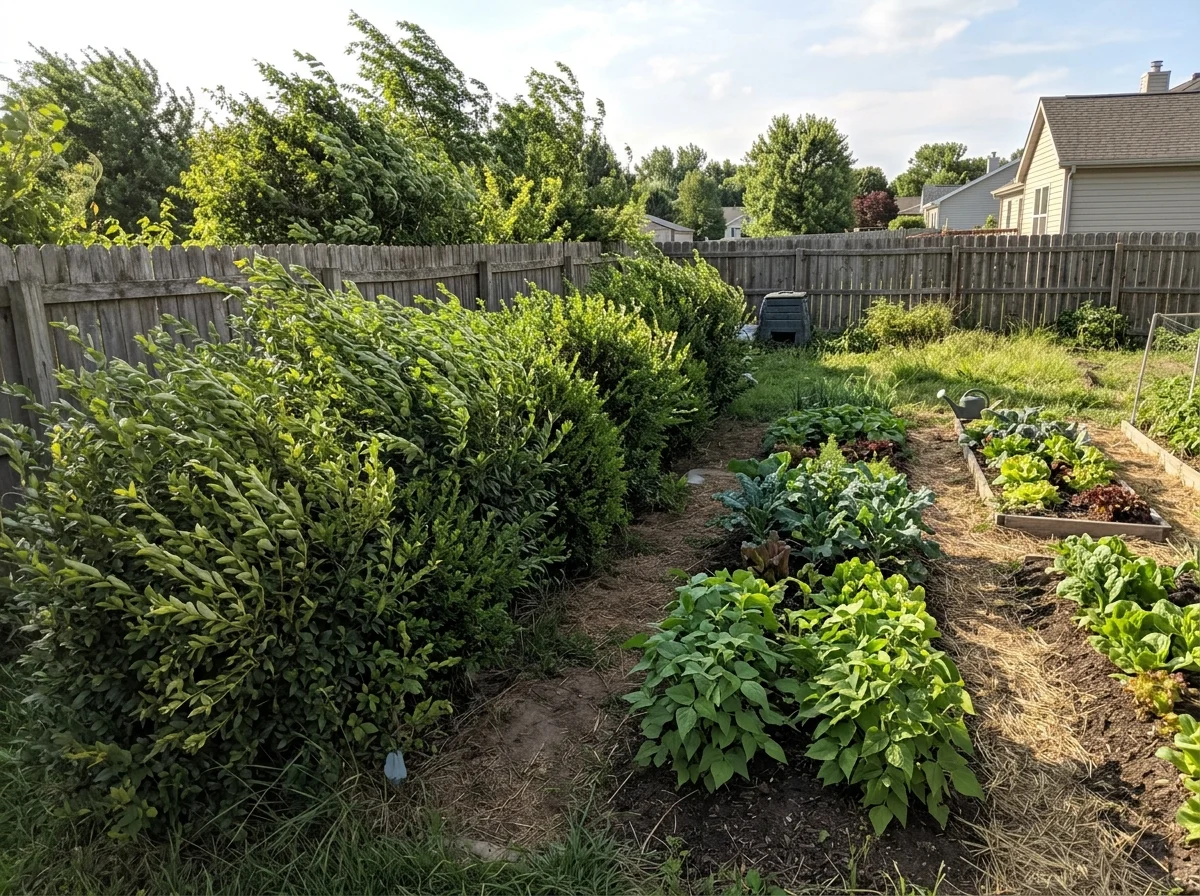
In a yard exposed to consistent wind, orient rows running east to west and add a low windbreak, such as a row of sturdy shrubs or a slatted fence panel, on the windward side. Wind dries out soil faster and can snap tall, top-heavy crops like corn or sunflowers if they’re left unprotected.
14. The Yard Split by an Existing Path or Driveway
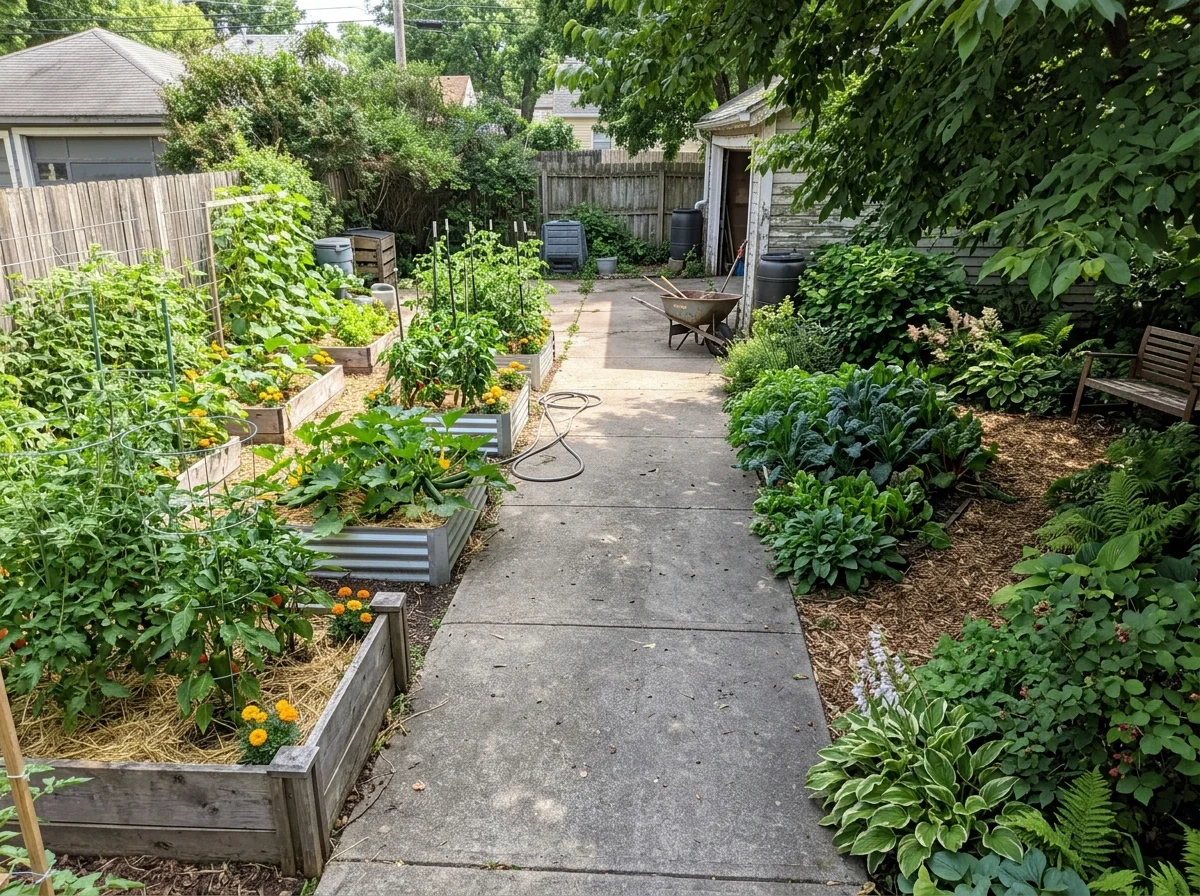
When a path or driveway cuts your yard into two separate zones, treat each side as its own mini garden instead of trying to force one connected layout. Match each zone’s plants to its specific sun exposure, since driveways often reflect heat and light differently onto nearby beds.
15. The Yard with a Steep Single-Direction Slope Facing South
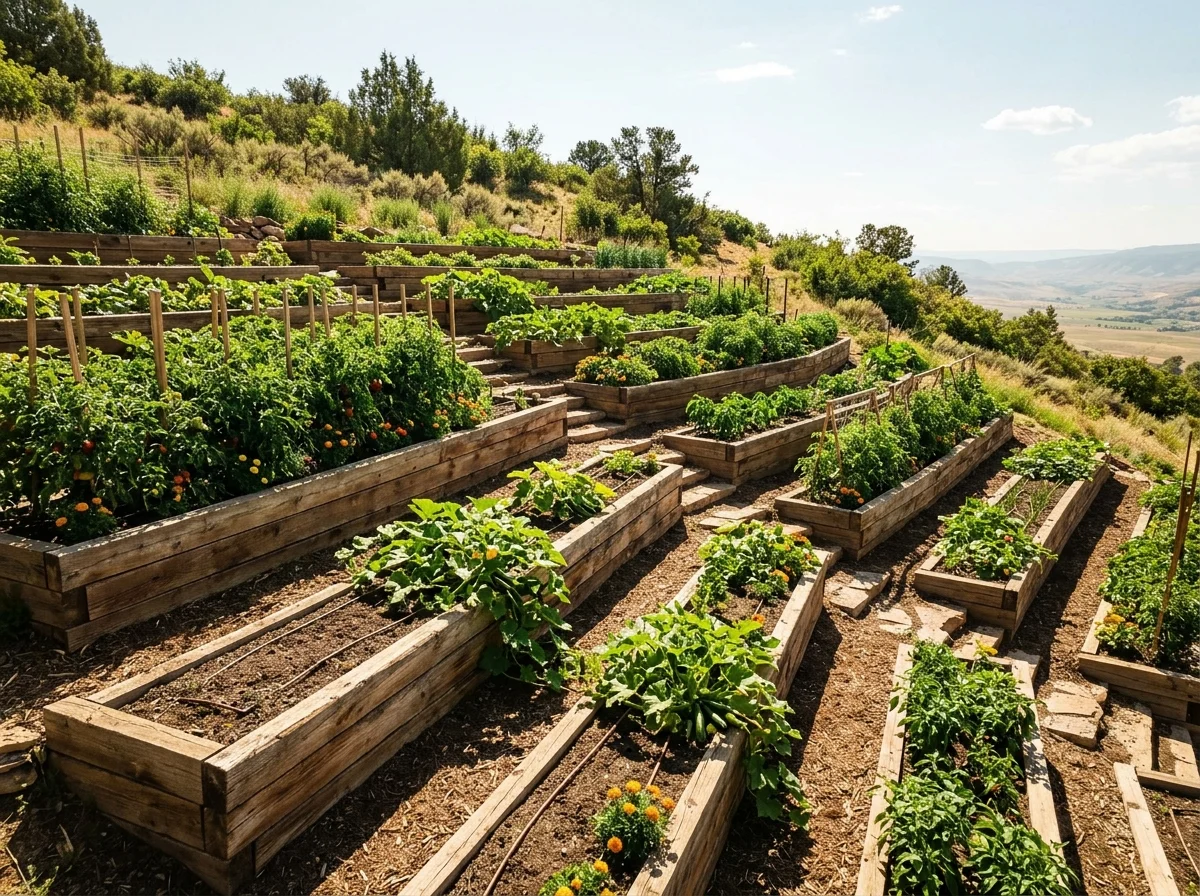
A south-facing slope actually works in your favor for heat-loving crops like peppers and melons, since the angle increases direct sun exposure. Build horizontal terraces that follow the slope’s contour lines instead of running beds straight up and down, which erodes badly in rain.
16. The Yard Shaped Like an L
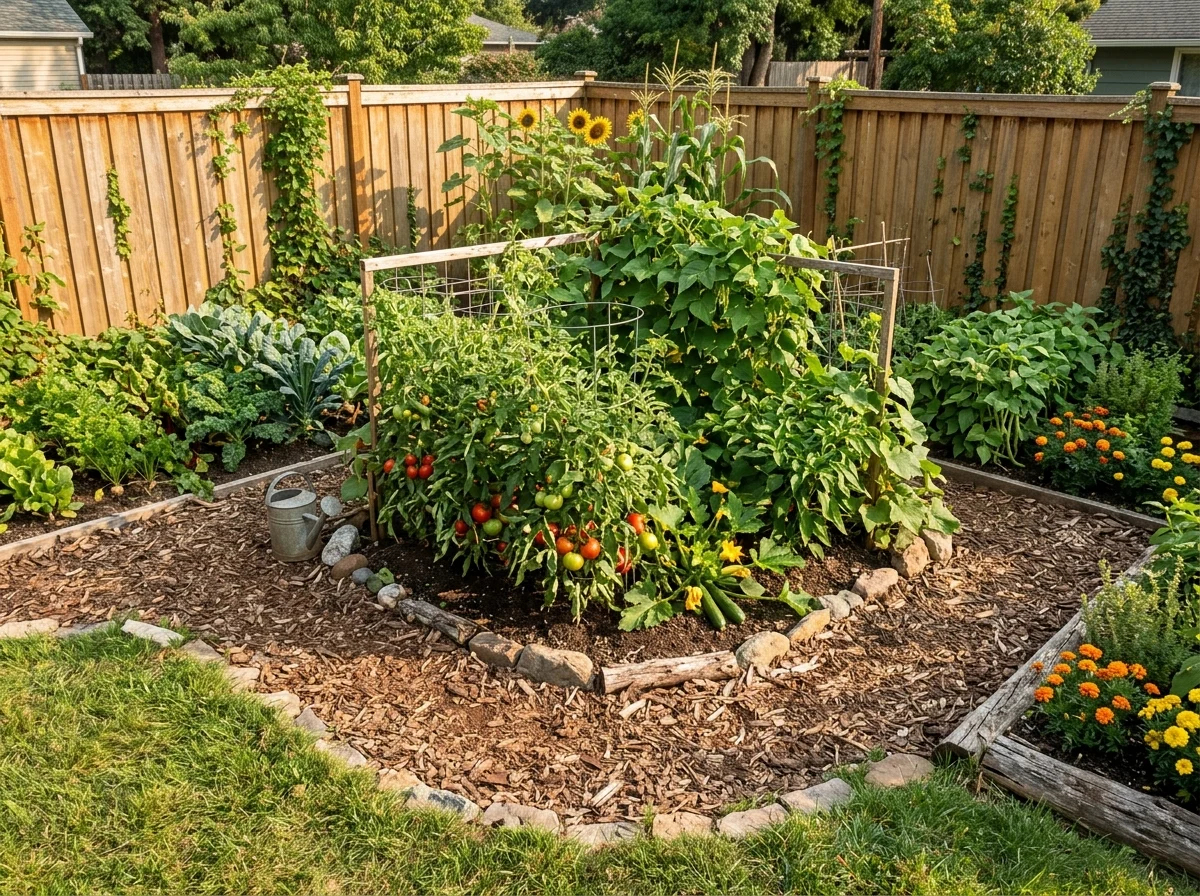
An L-shaped yard works well split into two connected layout zones, one along each arm of the L, joined by a path at the corner. Use the corner itself, which often gets sun from two directions, for your sun-hungriest crops.
17. The Yard with a Septic Field
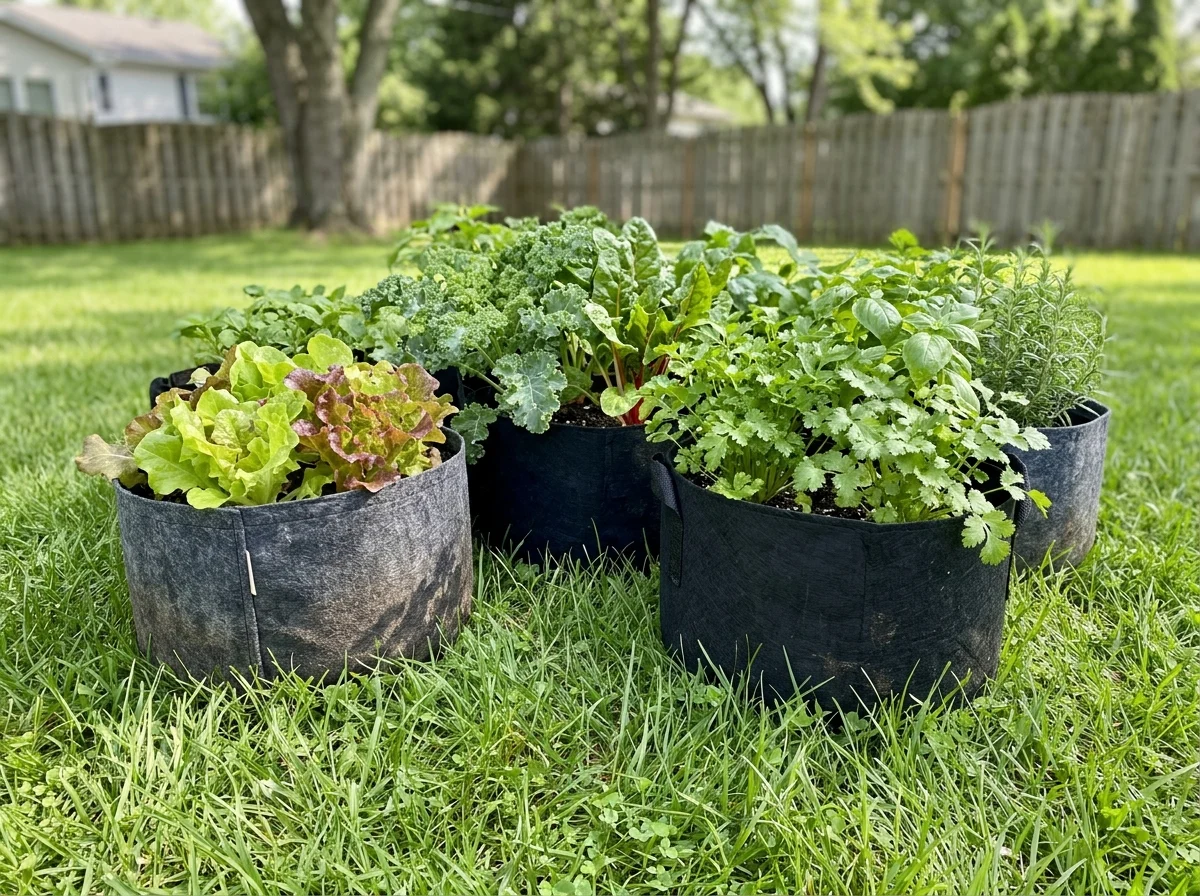
Avoid deep-rooted crops and raised beds with dug foundations directly over a septic field, and instead use shallow-rooted crops in aboveground containers or fabric grow bags placed on top of the grass. Root vegetables and trees are the biggest risk to septic lines, so stick to leafy greens, herbs, and shallow bush crops in this zone.
18. The Yard That Floods Seasonally
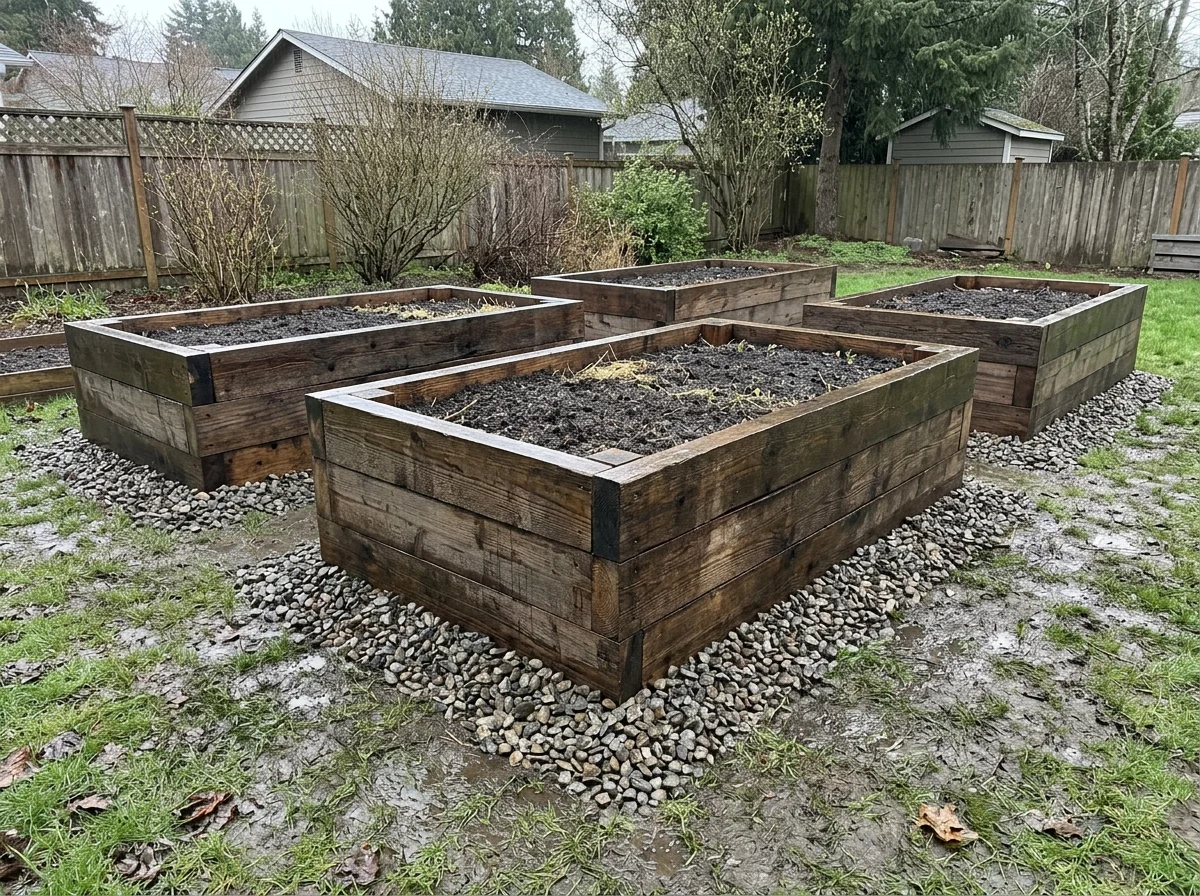
In a yard prone to seasonal flooding or standing water, raised beds built well above grade, 12 to 18 inches tall, keep roots above the waterline during wet stretches. Add gravel or a layer of coarse sand at the base of each bed to improve drainage further.
19. The Yard with Only Morning Sun
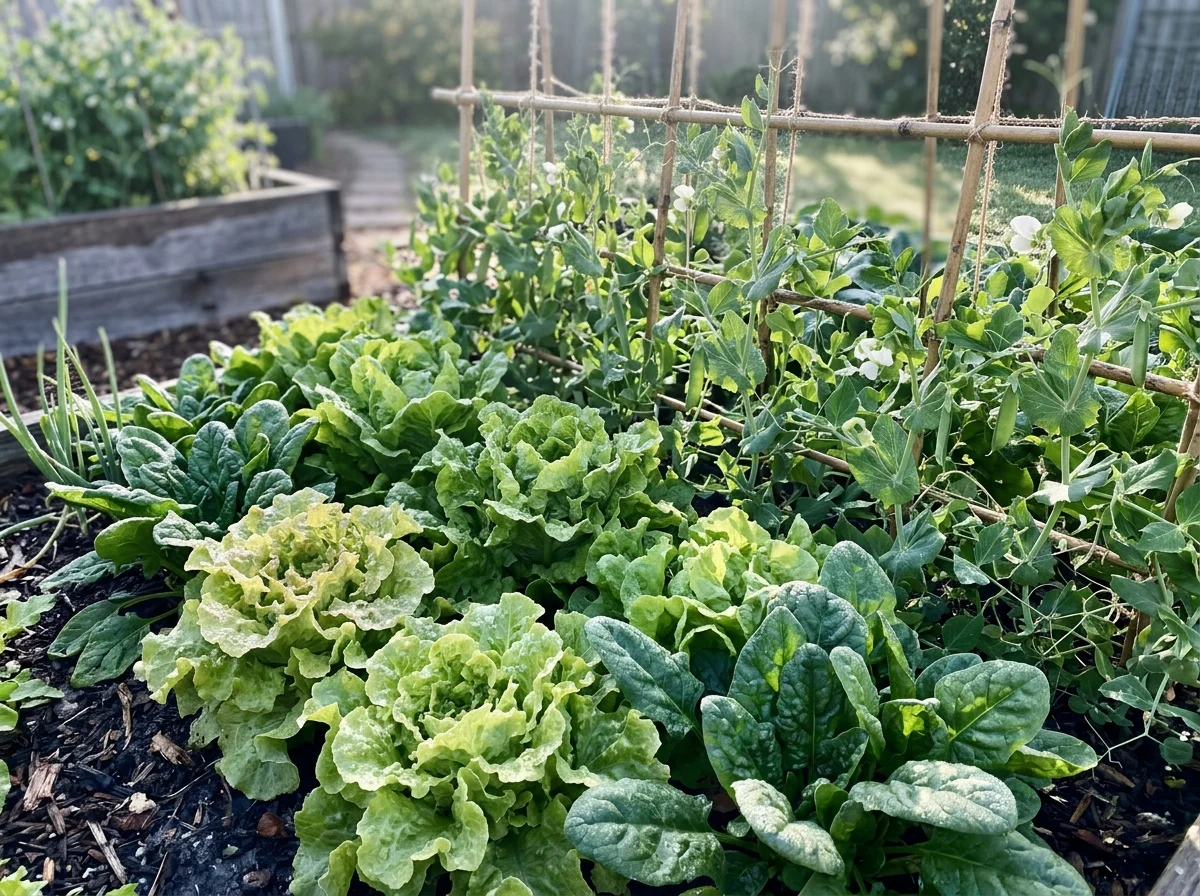
If your yard only gets strong sun in the morning and shades out by early afternoon, prioritize crops that tolerate partial sun, such as lettuce, spinach, peas, and many herbs, over full-sun crops like tomatoes and peppers. Place any sun-loving crops you do grow in the spot that holds morning light longest.
20. The Tiny Balcony or Patio “Yard”
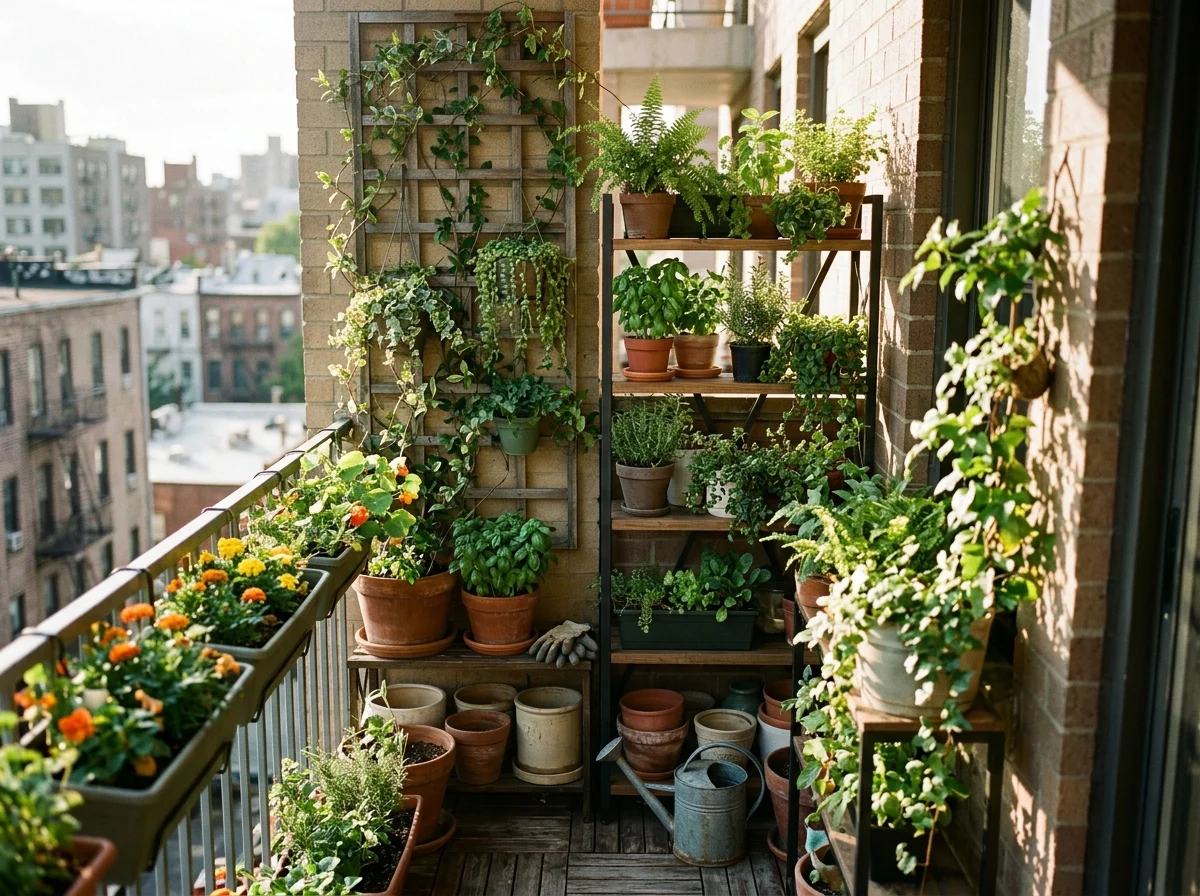
Without ground space at all, build a vertical tiered layout using stacked planters, railing boxes, and a wall-mounted trellis to multiply your growing area within a small footprint. Group containers by height, tallest at the back, so shorter plants in front still get full light.
21. The Yard with an Existing In-Ground Pool
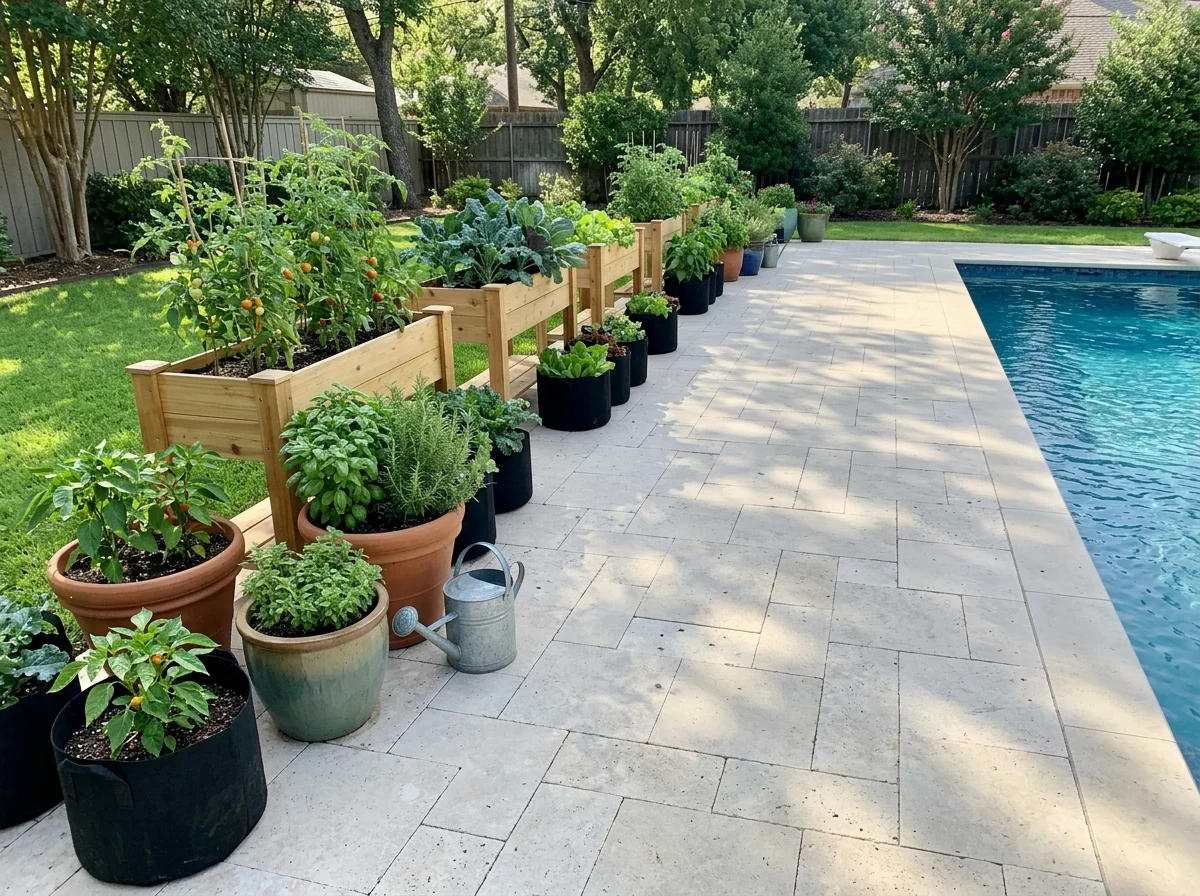
Keep a vegetable layout at least 8 to 10 feet back from pool edges to avoid root damage to the pool structure and reduce debris falling into the water. Use the deck-adjacent zone for containers instead of in-ground beds, since this keeps the layout flexible and easy to move for pool maintenance.
22. The Yard with a Homeowners Association Restriction
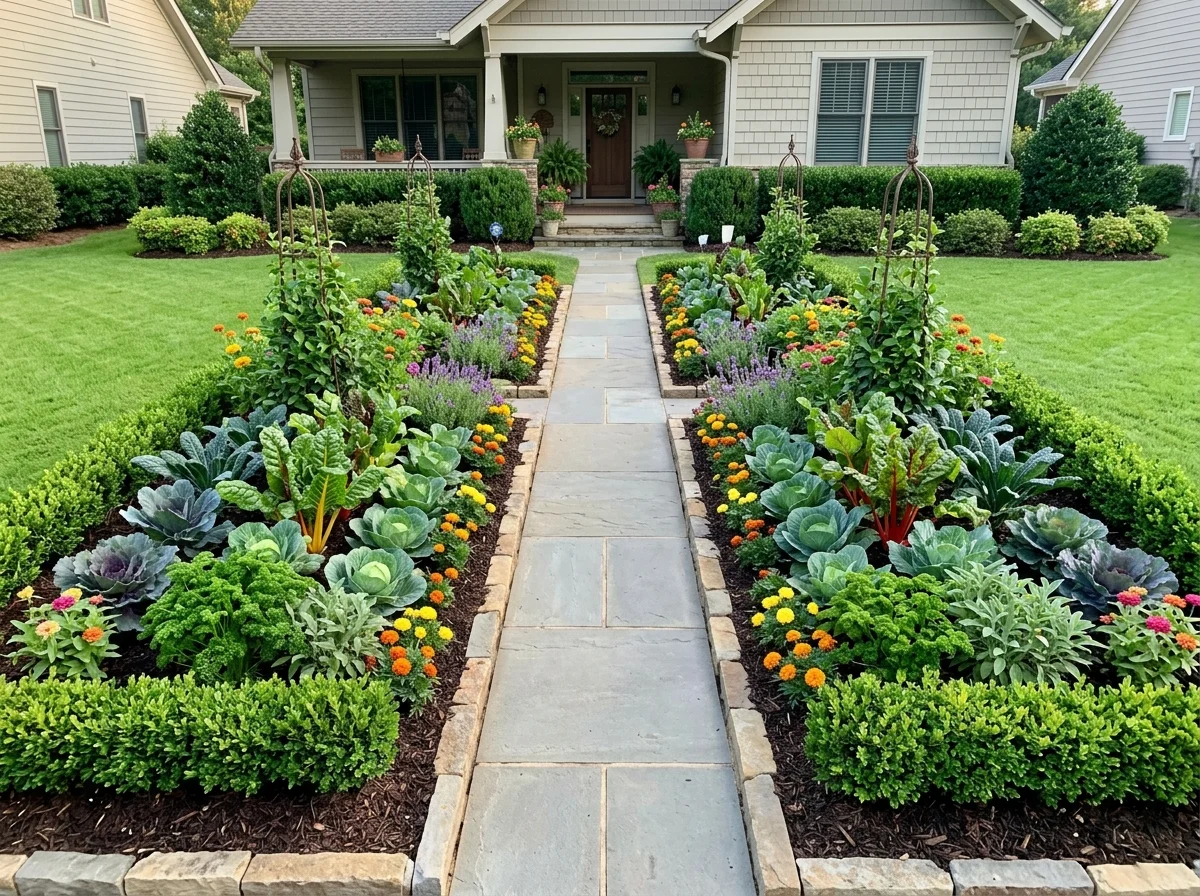
When an HOA restricts visible vegetable gardens, use a layout tucked into the backyard behind a fence line, or disguise front-facing beds within a more ornamental design using decorative edging and a mix of vegetables and flowers. Check your HOA’s specific language, since many restrict “unscreened” gardens instead of gardens entirely.
23. The Yard Shaped Like a Triangle
A triangular yard, common on cul-de-sac lots, works best with a layout that follows the two longer edges in an angled row pattern, leaving the narrow point for a single feature planting, a compost bin, or storage. Trying to force a square grid onto a triangular lot wastes the corners.
Spacing Tip for Angled and Triangular Beds
When beds follow an angled or triangular edge, measure your row spacing from the row itself instead of from the yard’s boundary line, since the distance to the edge changes along an angled row. This keeps plant spacing consistent even when the surrounding bed shape isn’t a simple rectangle.
24. The Yard with Multiple Small Sunny Pockets
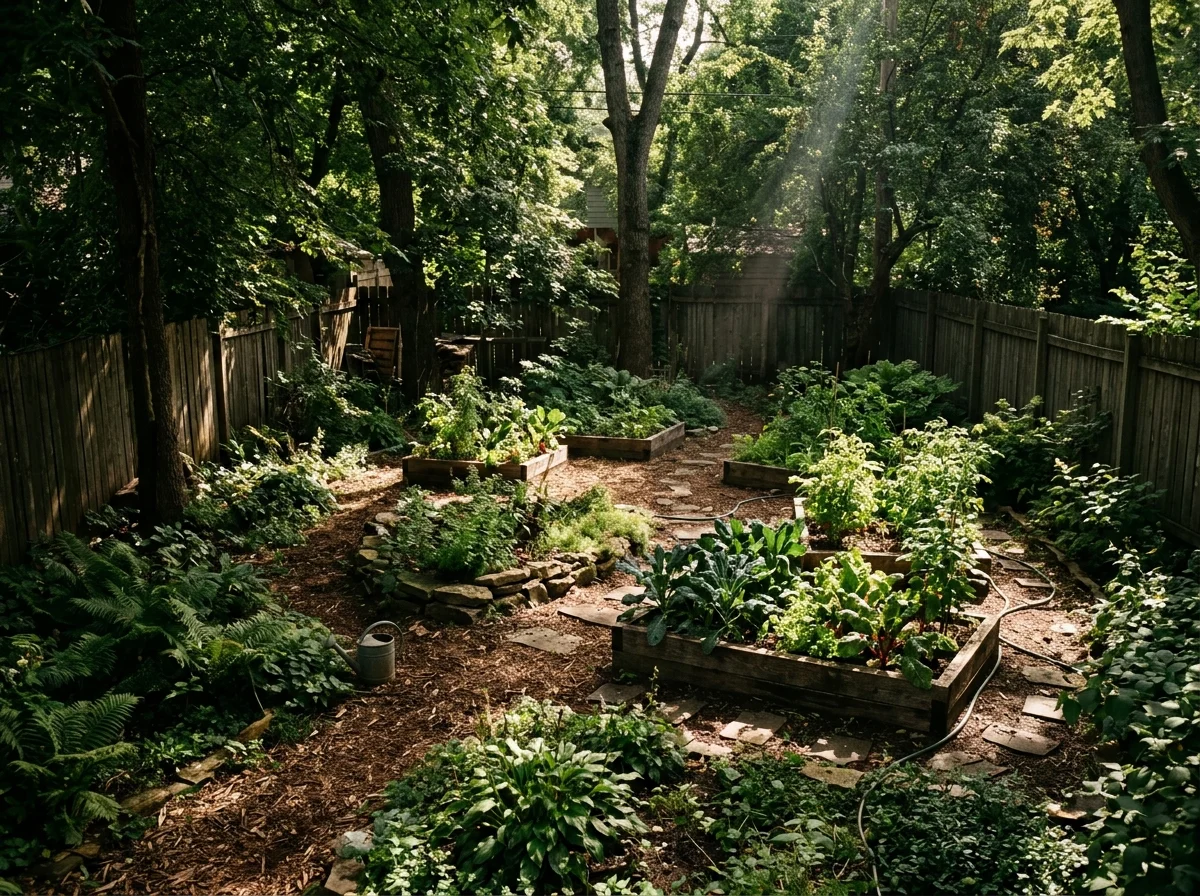
If your yard has several small sunny patches scattered between shade instead of one large sunny area, build a distributed layout of small raised beds or containers placed in each pocket instead of forcing one central garden into a shadier spot. Track which pocket gets the most consistent sun and reserve it for the crops that need the most light, like tomatoes.
25. The Yard Behind a Detached Garage
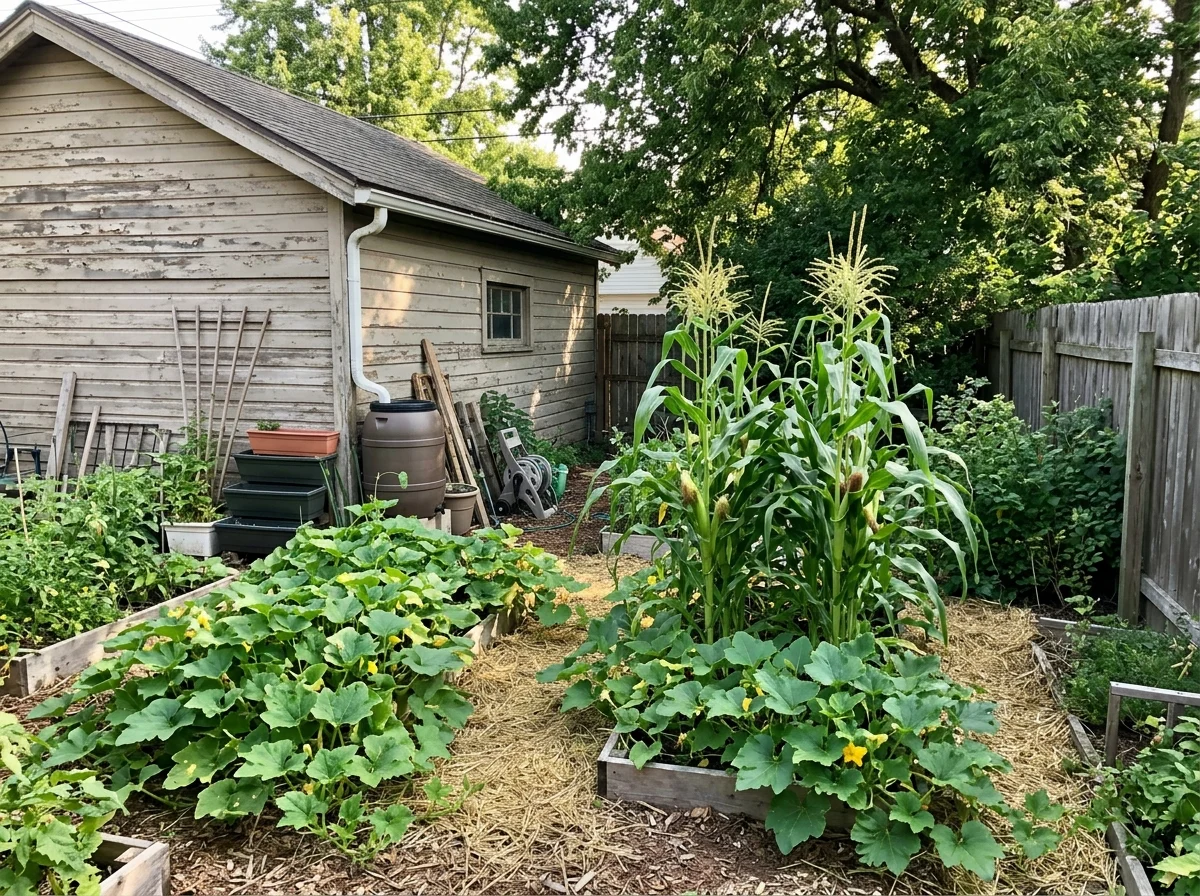
Space behind a detached garage is often overlooked, but it works well as a hidden, practical growing zone, especially for crops you don’t need visible from the house, like squash, corn, or a compost setup. Check the sun exposure carefully first, since the garage itself can cast significant shade for part of the day.
26. The Yard with a Retaining Wall
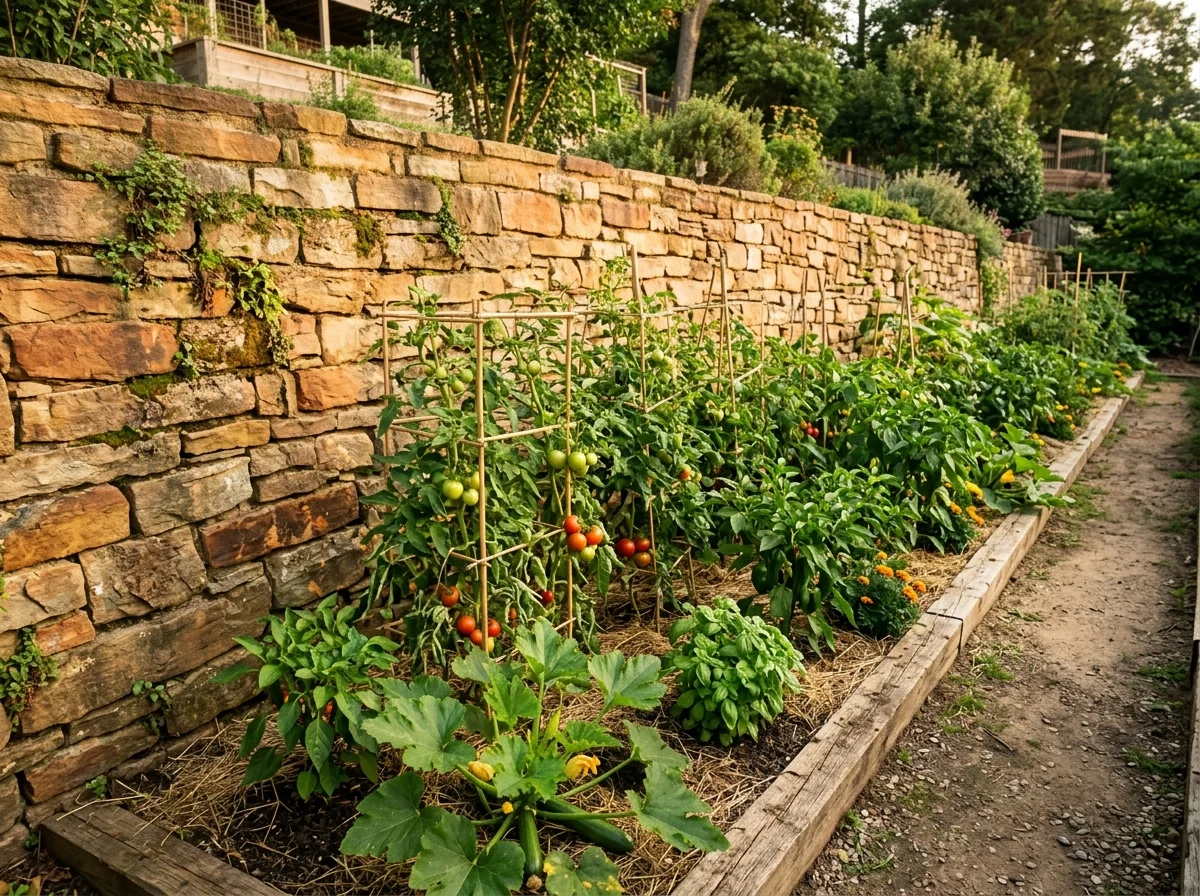
Use the base of a retaining wall as a warm microclimate for heat-loving crops, since stone or concrete walls absorb and radiate heat that can push nearby soil several degrees warmer. Build a single long bed running parallel to the wall, leaving at least a foot of clearance to avoid drainage issues at the wall’s base.
27. The Yard That’s All Grass with No Existing Beds
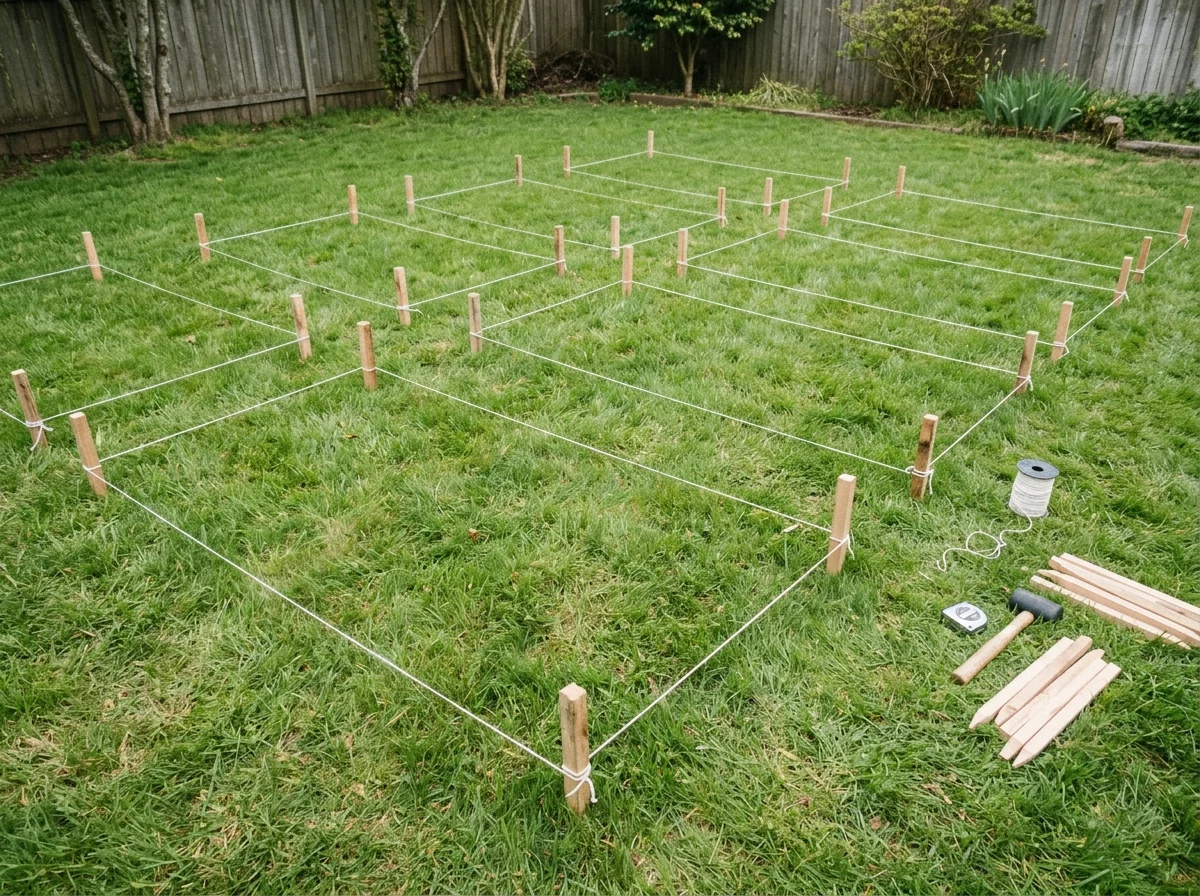
Starting from a completely blank lawn, mark out a simple grid layout of rectangular beds using stakes and string before removing any grass, so you can walk the plan and adjust before committing. A grid of 4-by-8-foot beds with 2-foot paths is a reliable, easy-to-scale starting layout for a first-time blank yard.
28. The Yard Shared with a Vegetable-Averse Housemate or Neighbor
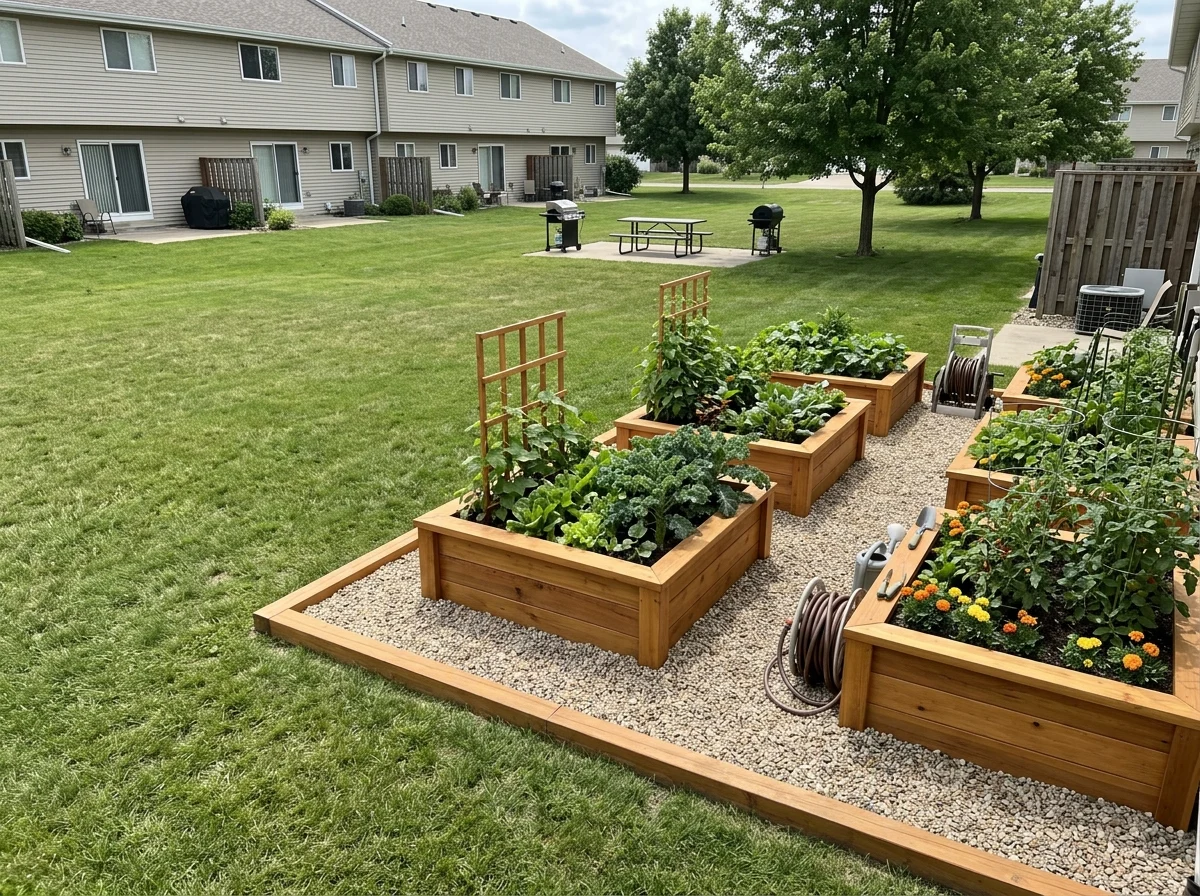
When shared yard space means keeping the garden compact and tidy for someone else’s comfort, use a contained layout with clear borders, like raised beds with finished wood edges, set in one defined zone instead of spreading crops across the whole yard. A defined, contained layout reads as intentional instead of encroaching.
29. The Yard with Heavy Deer or Rabbit Pressure
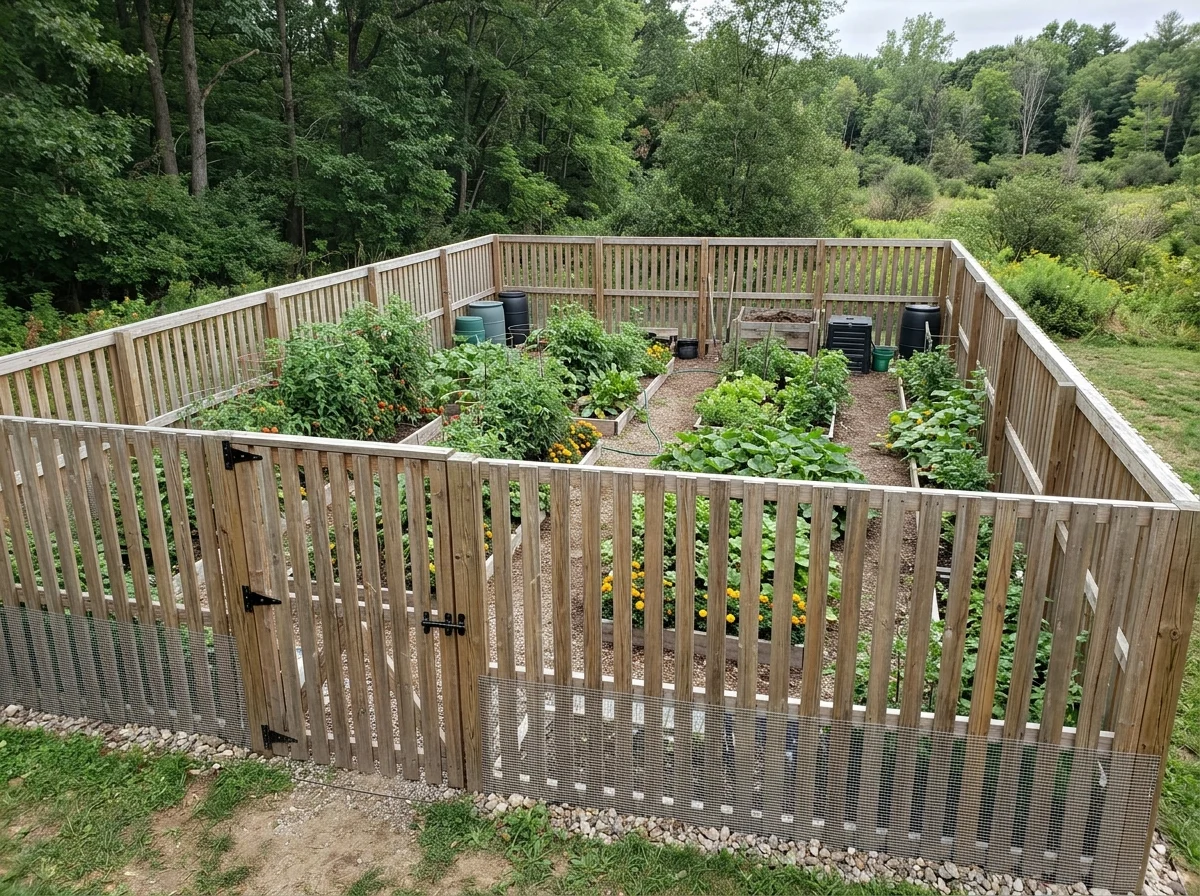
In a yard with regular deer or rabbit visits, design the layout around a single fenced perimeter instead of scattered unprotected beds, since one well-fenced area is far easier to defend than several small vulnerable ones. Fencing at least 8 feet tall is generally needed to keep deer out reliably, while rabbit fencing can be much lower but needs to be buried a few inches into the ground.
30. The Yard You’re Planning to Expand Gradually
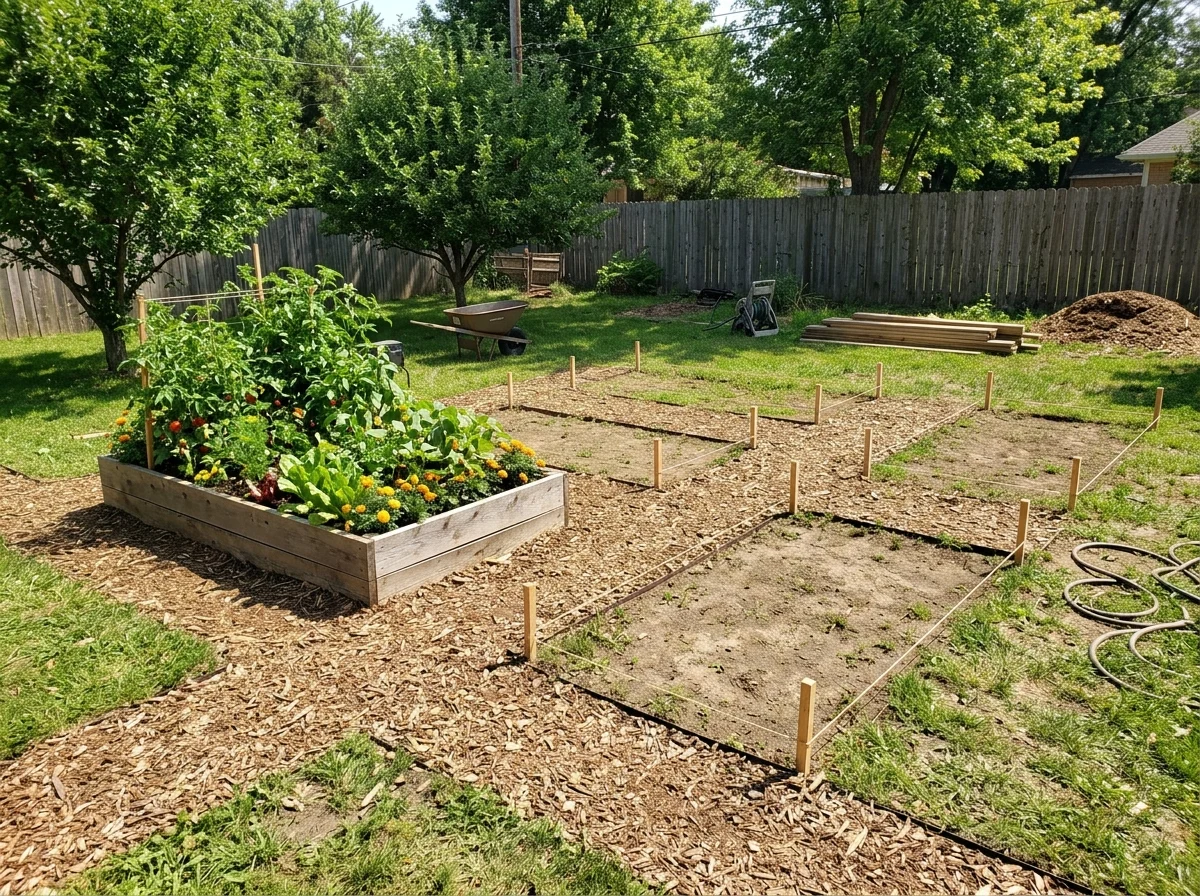
If you’re not ready to commit to a full garden this season, start with a single anchor bed in the sunniest available spot and lay out the rest of the yard on paper with space reserved for future beds. Leave clear, walkable paths between the current bed and the reserved future space so the yard doesn’t feel unfinished in the meantime.
Conclusion
The best vegetable garden layout is the one built around the yard you actually have, not a generic template from a magazine. A narrow side yard, a sloped lot, and a shaded corner call for different solutions, and matching your layout to your yard’s real shape is what makes a garden work long term. Start with the entry closest to your own yard, adapt the spacing and crop choices to your climate, and adjust as you learn how sun and water move through your space.
Frequently Asked Questions
What is the best vegetable garden layout for a small yard?
A tight grid of raised beds or a vertical layout using trellises and stacked containers works best for a small yard, since it maximizes growing area without wasting space on wide paths. Focus on compact, high-yield crops like bush beans and leaf lettuce instead of sprawling vegetables. Vertical structures let a small yard produce far more than its footprint would suggest.
How do I lay out a vegetable garden on a sloped yard?
Build terraced beds that follow the slope’s contour lines, using retaining boards or stacked stone to create level planting surfaces. Terracing stops soil and water from washing downhill and makes the slope far easier to actually work in. Each terrace should be at least 2 feet deep to hold enough soil for most vegetables.
Can I grow a vegetable garden if I’m not allowed to dig into the ground?
Yes, raised beds and containers set on top of existing grass or pavement, with a weed barrier underneath, work well when digging isn’t allowed. Fabric grow bags are especially practical for rentals since they’re lightweight and can move with you. This approach works on patios, driveways, and rented yards alike.
How much space do I need for a basic vegetable garden layout?
A basic, productive vegetable garden layout can work in as little as 80 to 100 square feet using raised beds or a tight grid with vertical structures. Even smaller spaces, like a balcony with stacked containers, can grow a meaningful amount of food. The layout matters more than the total square footage for a small space.
How do I plan a garden layout around a shade tree?
Place sun-loving crops in the sunniest arc of the yard away from the tree’s canopy, and reserve the shaded area for shade-tolerant crops like lettuce, spinach, and herbs. Avoid digging beds directly over major roots, since this harms the tree and limits its water. Containers placed near the tree work well since they don’t disturb the root system.